First ever boat project '73 Lund 14'

TinBoats.net

Help Support TinBoats.net:

This site may earn a commission from merchant affiliate links, including eBay, Amazon, and others.

Colorado1135

Well-known member
Joined
May 6, 2015
Messages
138
Reaction score
10
Location
South Dakota
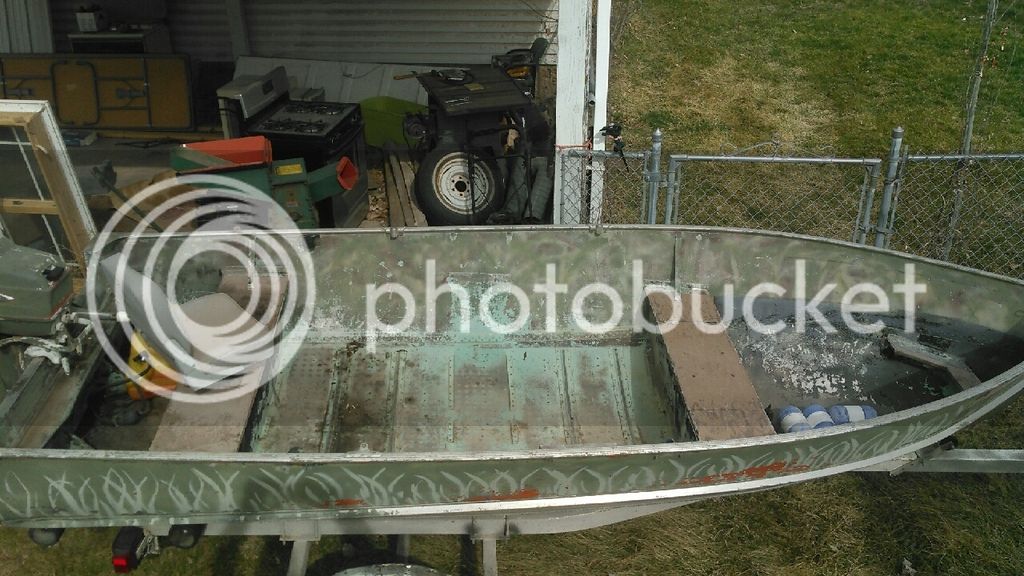
Been around boats most of my life, used many kinds but now that I own my own one I find myself stumped with simple questions that most boat owners do or should know. I decided to do it right and buy a fixer upper and learn every square inch of her as I go. might be a hard lesson, but I will know every rivet and rib before I'm done. so before I get long winded I'll post a pic of my gem and what I have done so far (hopefully correctly).

This is the day I brought her home


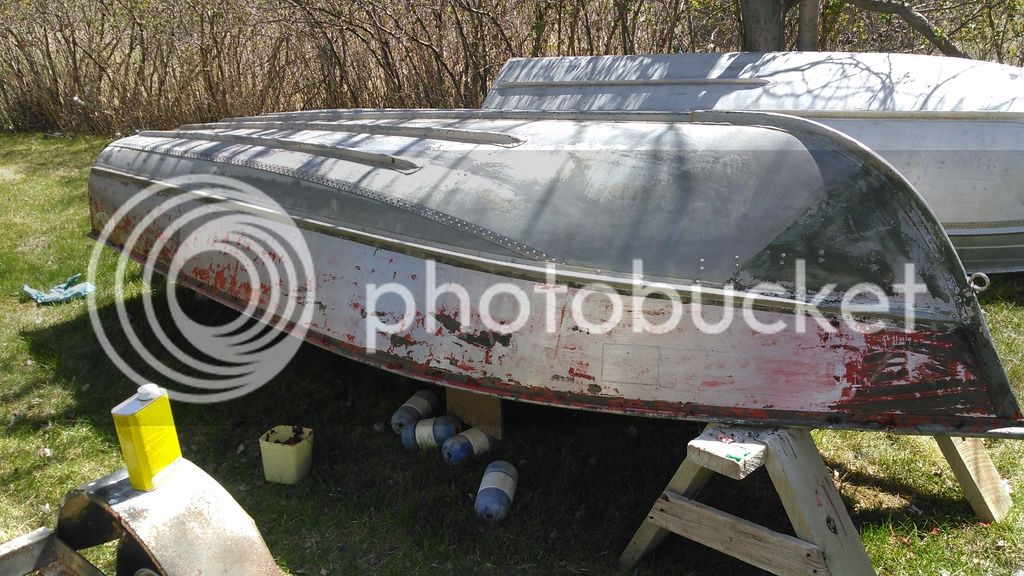
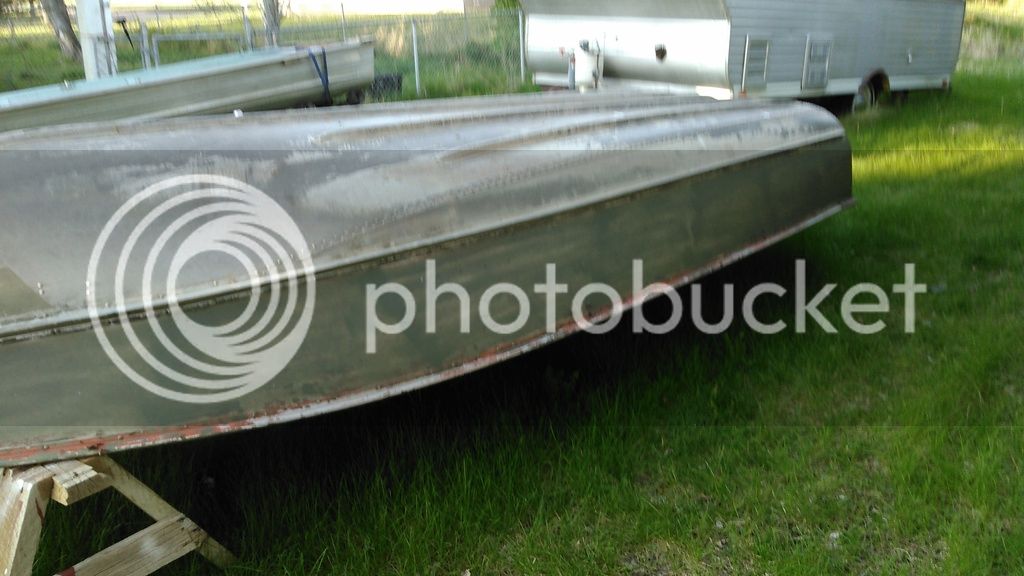
So far I have stripped the painted sides, applied etching primer and painted it with implement paint. I figure Grey would be a good comfortable color reminding me of my Navy days.


I'm about to start on the deck and I realized I have no idea where to start. I tried searches on basic info but to no avail. the questions I have are:

What are the Do's and Don'ts to a project like this?

Are pop rivets ok to use, and where?

how do I select my floor supports, and how do they tie in to the hull?

is it taboo to put holes in the hull? I would think so..

is there a way to rivet the same way Lund did when she was built?

where do I find seats? can I make my own?

Should I strip and paint the inside, or leave it since it will be covered up?

what's the best way to test the rivets? fill it with water? or will a suction cup work?

I feel like a total novice and don't know where to start. I figured I would ask now than come later and say "hey I did this, how do I fix my screw up?"

pictures do wonders, especially close ups.
can anybody steer me in the right direction?

Thank you in advance!

Ryan
 
Lots of questions here


Colorado1135 said:
What are the Do's and Don'ts to a project like this?

Too many to list!

Colorado1135 said:
Are pop rivets ok to use, and where?

Yes, for internal framing

Colorado1135 said:
how do I select my floor supports, and how do they tie in to the hull?

First decide if you are going w/ aluminum or wood

Colorado1135 said:
is it taboo to put holes in the hull? I would think so..

Nah, just seal them w/ 3M 5200.

Colorado1135 said:
is there a way to rivet the same way Lund did when she was built?

Closed rivets (believe that is the proper term).

Colorado1135 said:
where do I find seats? can I make my own?

Assuming you are asking about replacing the original bench seats. yes, you can make your own.

Colorado1135 said:
Should I strip and paint the inside, or leave it since it will be covered up?

That's up to you. I left areas that would not be seen unpainted.

Colorado1135 said:
what's the best way to test the rivets? fill it with water? or will a suction cup work?

Fill it with water and climb underneath to look for leaks.


Good luck and nice platform to start with.
 
:WELCOME: to the Big Pond and THANK YOU for your service.

If you spend a few hours looking back over the hundreds of projects,
you will get at least an idea of what direction you want to go in.
have a question ?? use the SEARCH button. Many have photos of problems solved.

There are so many Lund owners here ya'll could start your own club !! LOL

Johnny (USN-RET)
 
Thank you for your service sir!

I've been looking at photos for weeks on here, not just hours.

I have the layout figured out, I've seen plywood, aluminum, steel and wood for floor supports. I realize I can use almost anything I want, I'm looking for advice, pro's and cons of each.

for instance. I would like to go with aluminum for the supports. how do I do it? angle? tubing?
how do I secure them to the floor? or do I? can I just ty them into the remaining seats lengthwise?
how do I keep them on the same plane and even? do I need spacers to the hull ribs for support or can they free float over them?
 
For aluminum supports, angle is the most popular choice. However, you can use just about anything, old extension ladders for example. To tie into the boat, use pop rivets into extising structures (seats, ribs). To attach to the ribs, cut some small pieces of angle to make some brackets, rivet those to the ribs and then rivet the support to the bracket. So if you want to add a deck, run some angle over and between the seats and drop some supports down to the rib. How many supports and how much spacing between the framing depends on what you intend to use for decking material and if areas will be supported by foam underneath. Keeping things on plane, you're going to have to start at the front and back of your deck, decide what level you want, and work your middle/inner supports from there.

Hope this helps, good luck.
 
That helps a lot, I was thinking of using 1/2" plywood for decking and sealing it well with epoxy. then covering it with carpet of some kind.

would 1" aluminum tubing be good and stout? or is it unnecessary?

would I need some type of support down the centerline on the ribs of the hull as well? or is that overkill?
 
Colorado1135 said:
That helps a lot, I was thinking of using 1/2" plywood for decking and sealing it well with epoxy. then covering it with carpet of some kind.

would 1" aluminum tubing be good and stout? or is it unnecessary?

would I need some type of support down the centerline on the ribs of the hull as well? or is that overkill?

1/2" ply is a good choice. Aluminum tubing is fine if that's what's available, however, check around and if there is a good deal on angle. Just think it may be easier to work with.

The support down the centerline, are you asking about drop support from bracing used to level the ribs? Depends on how long the braces are, but with 1/8" angle that I used, I put in some type of drop support every 12" - 18", seems very strong.
 
Ictalurus said:
Colorado1135 said:
That helps a lot, I was thinking of using 1/2" plywood for decking and sealing it well with epoxy. then covering it with carpet of some kind.

would 1" aluminum tubing be good and stout? or is it unnecessary?

would I need some type of support down the centerline on the ribs of the hull as well? or is that overkill?

1/2" ply is a good choice. Aluminum tubing is fine if that's what's available, however, check around and if there is a good deal on angle. Just think it may be easier to work with.

The support down the centerline, are you asking about drop support from bracing used to level the ribs? Depends on how long the braces are, but with 1/8" angle that I used, I put in some type of drop support every 12" - 18", seems very strong.

yes, either a drop support or a piece of tubing lengthwise perpendicular to the ribs to set the other angle on for center support. I talked to a friend who used just 1/2" plywood and he said his is very strong just as it is. I think I might just go with angle per your suggestion. probably be much cheaper and I won't see a difference.
 
Here in New Jersey, spring was late this year. I thought winter was never going to end. After seeing your post, I realized how lucky I am.

Hope it melts quick for you so you can get out on the water.
 
I've already mowed my lawn twice, this is a freak snowstorm. it's been anywhere from 40-70 in the last month or two.
crazy, but thats how it goes sometimes out here. snow is supposed to quit here this afternoon and switch to rain.
 
Take a look through my build, It sounds like I've covered just about all of your questions in my build.

https://forum.tinboats.net/viewtopic.php?f=21&t=33307
 
cool build, but this is more the floor plan I'm looking at doing. this drawing is extremely precise and is likely to be confused with a CAD drawing but I swear I did the whole thing in windows paint.
the cut away kinda shows more the end view on what I'm thinking. I was possibly thinking of using a 1-1.5" piece of tubing under the angle as a center support. are there any special rivet I need? size? thickness of the cross supports? is 1-1.5" aluminum angle sufficient for 3/8" ply wood?
where do you guys get the carpet for it?

 
well I got my 1.25" aluminum angle, 1/2" of CDX exterior plywood and am ready to start on putting the deck in today.
I even have the roll of carpet ready to put in, along with the necessary adhesive.

one quick question, how to I make the deck on the same plane as the boat. so that when it's floating in the water the deck is level? do I measure from the gunwales or put a 2x4 across the seats and go from that?

I'll be taking pics as I go and will update the thread. any last minute advice would be appreciated :)

Here's my plan. #6 I might do at anytime depending on the help and how patient they can be.

1. I'm going to the local Ace to see if they have any epoxy resin to seal the plywood
2. going to probuild to get foam board to put under the deck between supports
3. cut plywood to fit
4. seal plywood and set aside to dry
5 install aluminum braces.
6. take kids fishing
 
1. I'm going to the local Ace to see if they have any epoxy resin to seal the plywood

I'm almost certain they won't. We have West Marine here which is pricy for epoxy, we have TAP plastics which is a chain that sells there own epoxy cheaper than West Marine, but buying online is a LOT cheaper. Raka.com and UScomposites are pretty cheap for epoxy. I went with US composites, I got the kit which is mixed 2:1 so it makes 1.5 gallons of material. I only used about 60% of the epoxy on my 15 foot Klamath (3 coats each side of every piece of wood) if that helps you to decide how much you need. I found a a roller to be better than brush for applying IMO. More even coverage and the roller hold more material than brush.
 
Not sure if this is cheaper or more expensive than what you are already looking at but it might be worth a peak.

https://www.aeromarineproducts.com
 
I ended up finding a fiberglass resin in the automotive dept at ace hardware. it said it bonded to wood so I tried it. worked like a charm. we had near 100% humidity all weekend so I had the sunflower heater on it and a fan blowing and it sealed and hardened like a charm. got eh main decking in and man is it light, I had to rethink my original design and it worked like a charm. I really took my time and probably overplanned it. but I am very happy with the results.


Here is a pic of the deck once it was in place, like an idiot I didn't take pics of the framing and install but I will be happy to recap it for anyone.
I decided to go lengthwise with the runners(joists) and I was using 1 1/4" aluminum angle. once I had the frame built I saw right away it was too felxible. so undeterred I put it in place and measured across the ribs in the hull for cross supports. I riveted those in place and man it made a huge difference in support. I resined the wood, glued down the carpet, tucking the ends between the 1/2" plywood and end cross angle. then I glued in 1" closed cell foam between the joists. I riveted those to the sides of the seats with 3 rivets between each joist with a total of 18 rivets on each end. each joist rested perfectly on the rib cross pieces. the total floor weighed about 30 lbs total by my estimation, it may have been a little less.

next I figured out the curvature of the bow and cut a template on a piece of panneling I had from the basement remodel. apparently I'm not as good at that part as I was the floor, but it's close enough for us. After cutting out the plywood I sealed it in the same fiberglass resin and let it dry overnight.
here's a pic of the cut outs layed in place as a mock up to show how the layout will be. as you can see I had a little helper who was more than willing to model the project.


I was able to secure the floor deck without any visible screws, but I think I'm going to need to screw/bolt the bow and stern coverings using exposed fasteners. I'm thinking SS self tapping flush mount screws, does anyone have any recommendations?
 
The SS should be fine, with one VERY LIGHT YELLOW Flag. Even in freshwater, you need to think about the corrosion cause by dissimilar metals getting wet together. The both the aluminum and the SS will corrode over time, but at different rates, so you may end up needing to replace something sooner then later because of this. and by sooner I mean 5-10 years instead of 20 to never. With that deck layout I'd see if you can rivet it like the rest of the boat.
 
riveting shouldn't be a problem, i was concerned with them working loose over time. I suppose it would be easier to replace a rivet now and again rather than framing/corroded screws. thank you for the input I will likely go this route.
 

Latest posts

Top