Deck and Casting Platform - 16' Crestliner

TinBoats.net

Help Support TinBoats.net:

This site may earn a commission from merchant affiliate links, including eBay, Amazon, and others.

Go Fish

Well-known member
Joined
May 23, 2011
Messages
54
Reaction score
0
Location
Hudson, MA
I recently came across this website and it seems to be the perfect place to share this project...being that it is a tin boat and all. I have posted some of this on other sites so for those of you who have seen it already: Sorry for the redundancy.

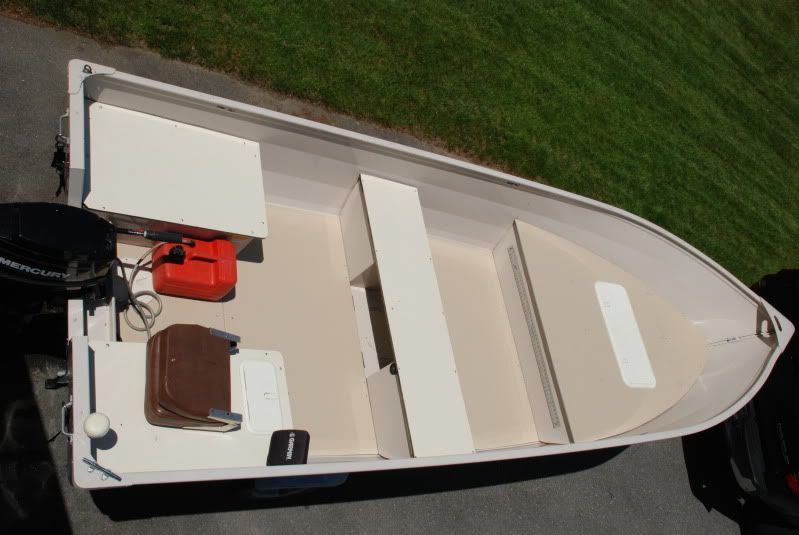
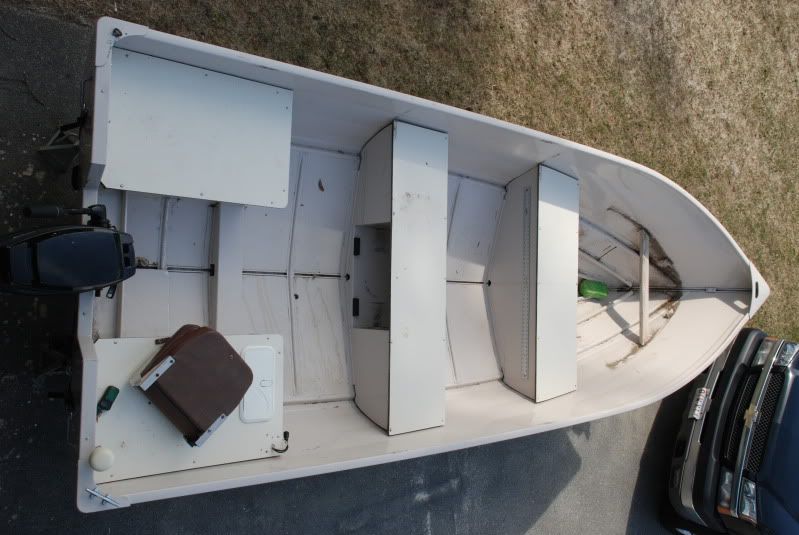
My 1.5 year old daughter made me get a 16 foot aluminum skiff last season to take her lake fishing and to the beach. While she approved of the boat I brought home, a 2002 Crestliner Sportsman 16 with a 25 horse Merc tiller, she was a bit bent that it didn't have a deck. Being 2 feet tall, she had a bit of trouble keeping her balance standing on the dry side of the running surface. I can't resist my little girl so I decided to just give in and build her a deck for her new boat.

Here is the reference image:

DSC_0534.jpg


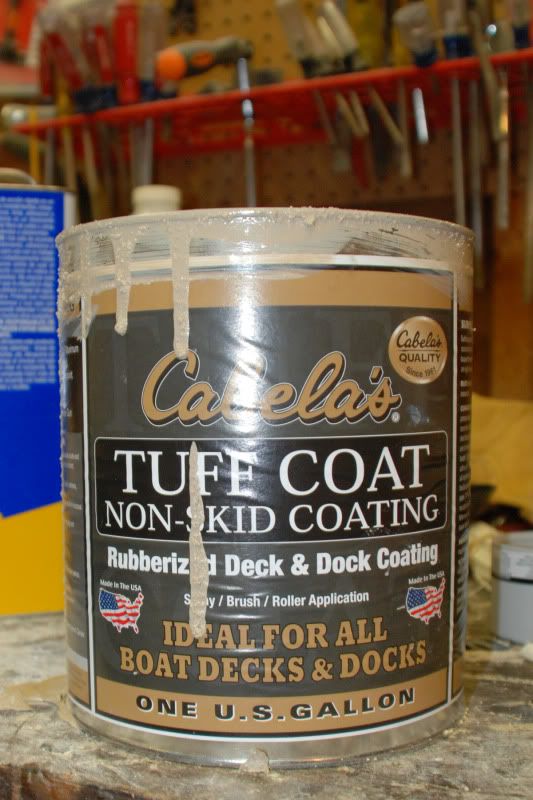
The plan is to core the new deck with 1/2" exterior ply, encapsulate it with some thin glass and epoxy and paint it with some rubberized non-slip deck paint. It should be pretty slick when it's done.

First I stripped off the stuff that was going to get in the way and then set to cutting templates. I made about 4 zillion measurements, transfered them to 1/4" plywood and then cut the rough shapes. Quite a bit of time was spent with a grinder shaving little bits off of the rough shapes until they fit into their respective spots.

DSC_0533.jpg


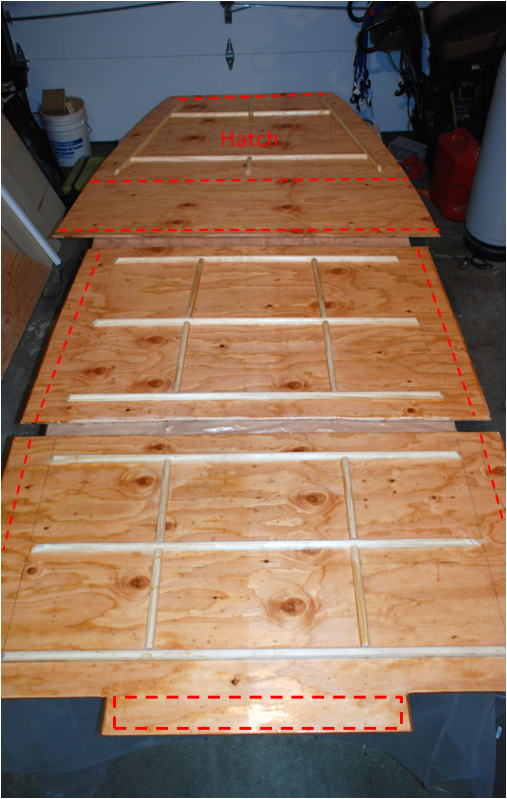
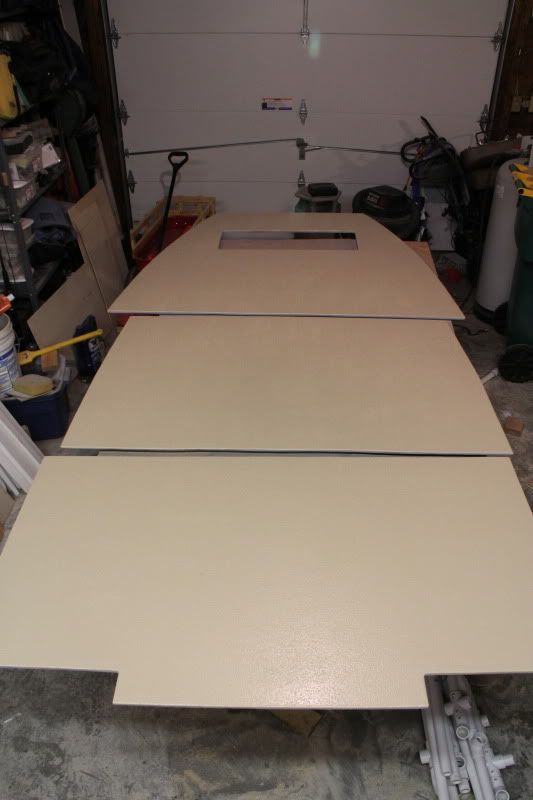
She really wanted a casting deck forward with tons of room for storage underneath it so I decided to go from the forward bench seat all the way to the bow. There should be room for alot of wet storage, a couple of dry storage hatches and the battery for the troling motor...

Oh yeah...she said she wanted to turn this little boat into a a bay and flats machine. I figure a trolling motor, some descretely installed electronics (including a stereo for the beach trips) and a jack plate to get the motor up and out should do the trick. If I can manage to set the jack plate up right this thing will run on wet grass.

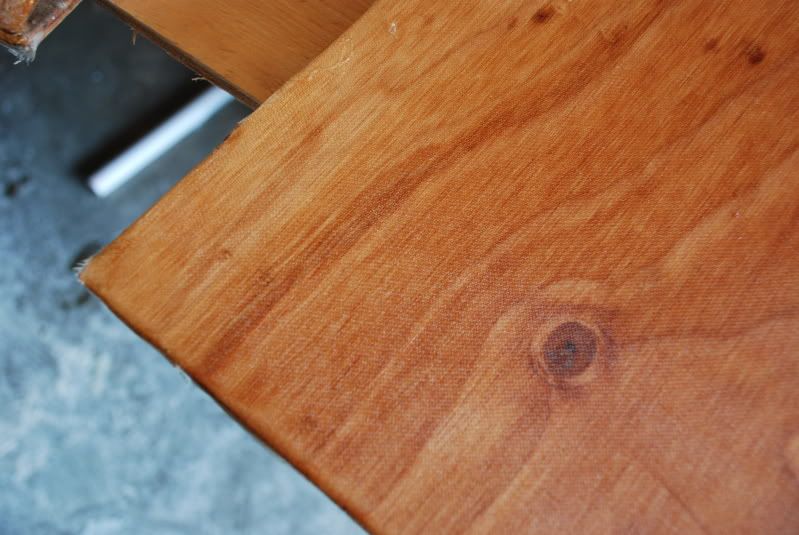
The shapes I cut in the 1/4" stock were transfered to 1/2" exterior grade ply and were cut.

My goal with this project is to add as little weight as possible and allow easy removal of the deck I'm installing. Additionally, I don't want to poke any holes in the aluminum skin. So, this "floating" deck will have to be stiff where it isn't fastened to the hull or parts that are welded to the hull.

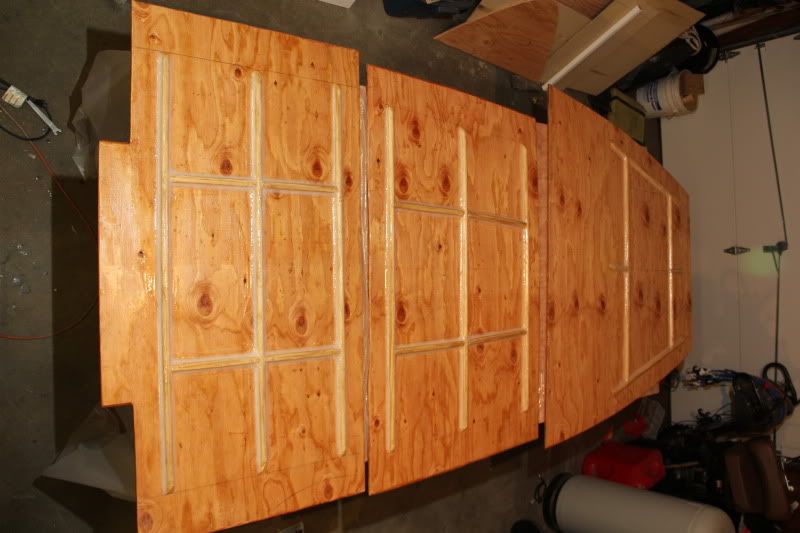
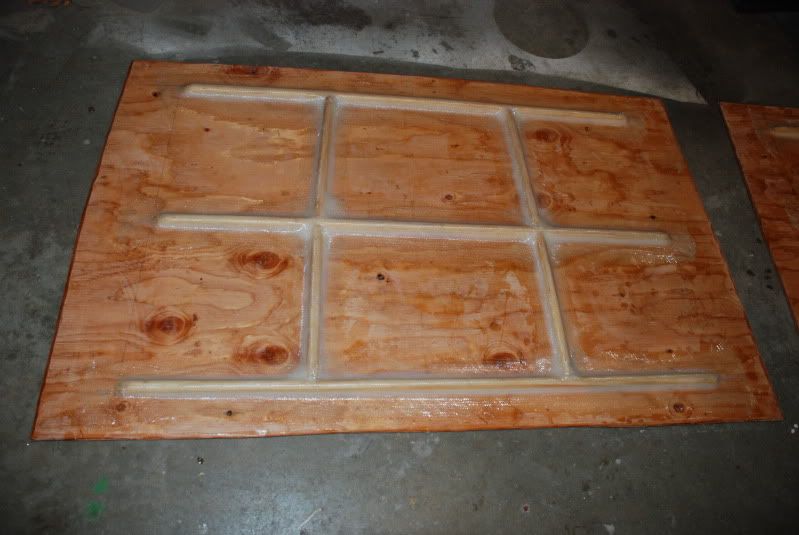
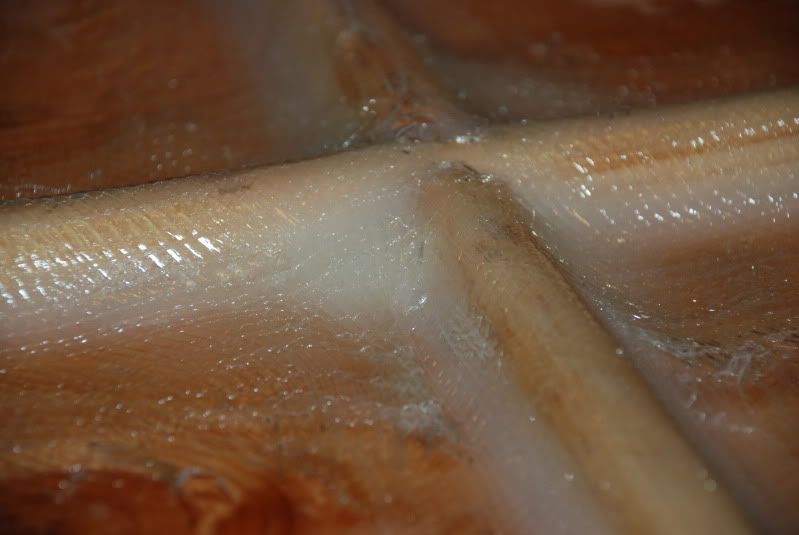
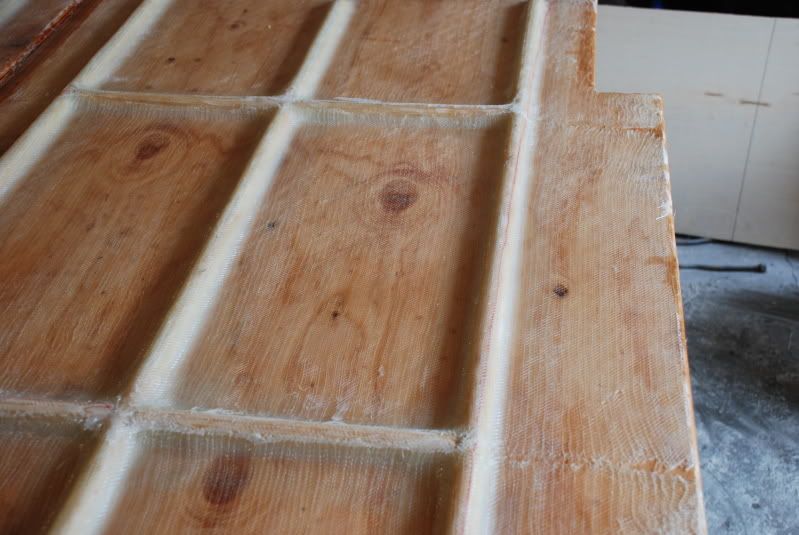
My solution is to add ribs to the underside of the deck:

DSC_0594.jpg


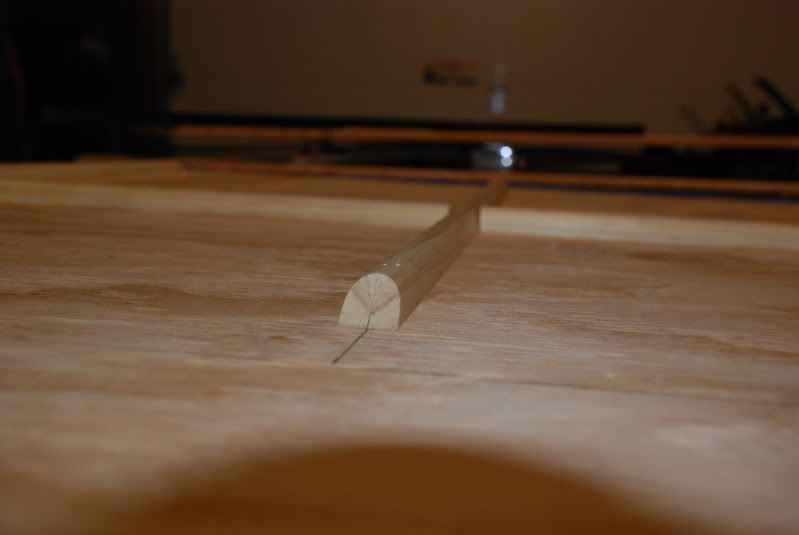
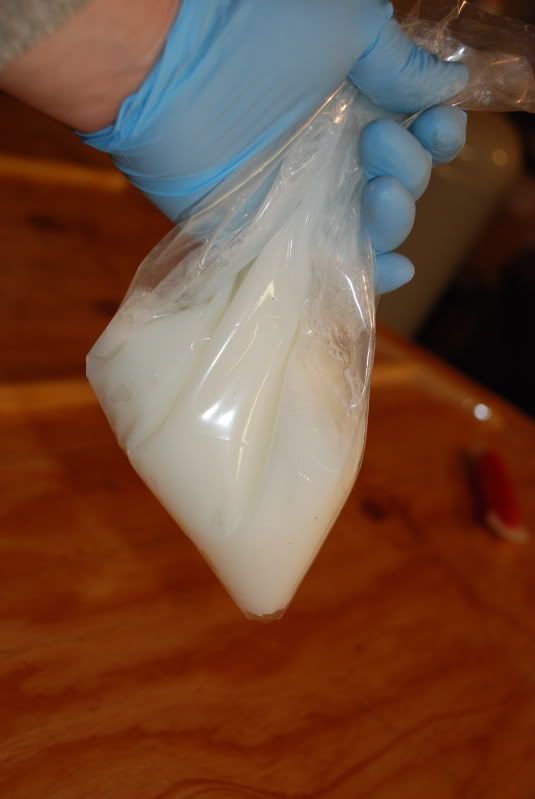
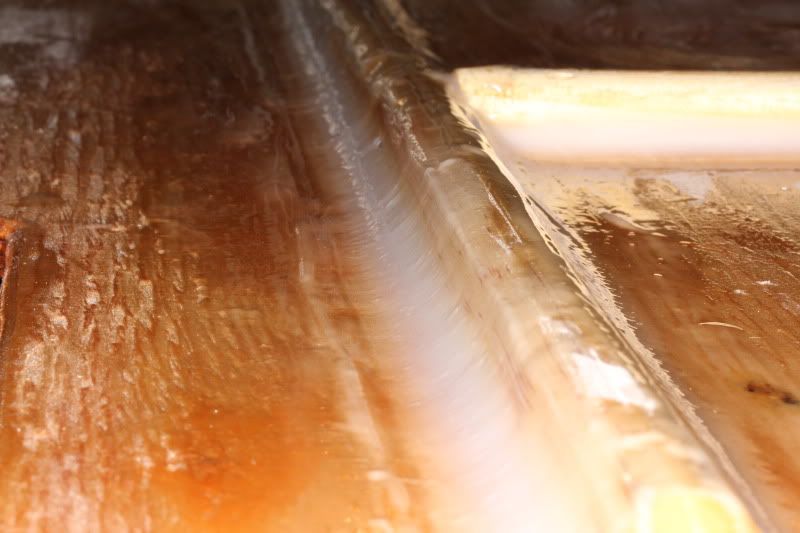
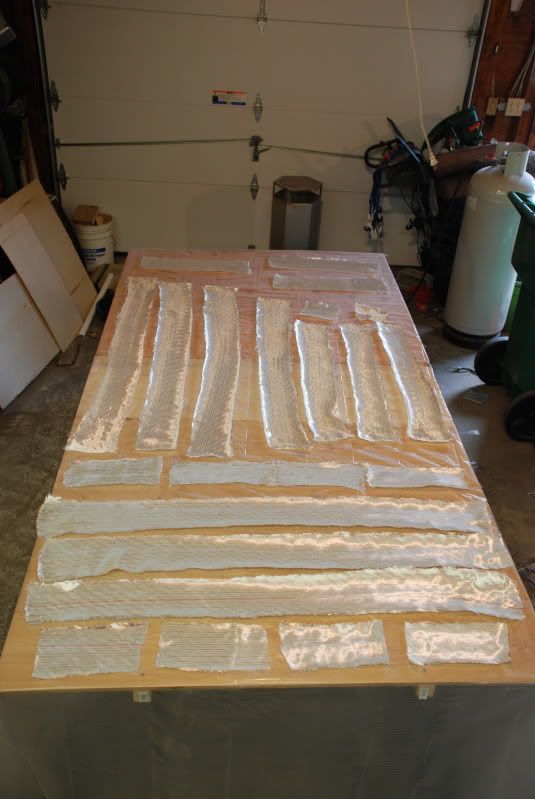
What you are looking at is 7/16 base shoe opposed to make a half round with the long sides perpandicular to the undreside of the deck. The bit between the underside of the deck and the rib will get a fillet of thickened epoxy before I apply 2 layers of 17 oz. biaxial glass.

Stiffness is commng from the glass. The base shoe is there just to make the glass take that shape.
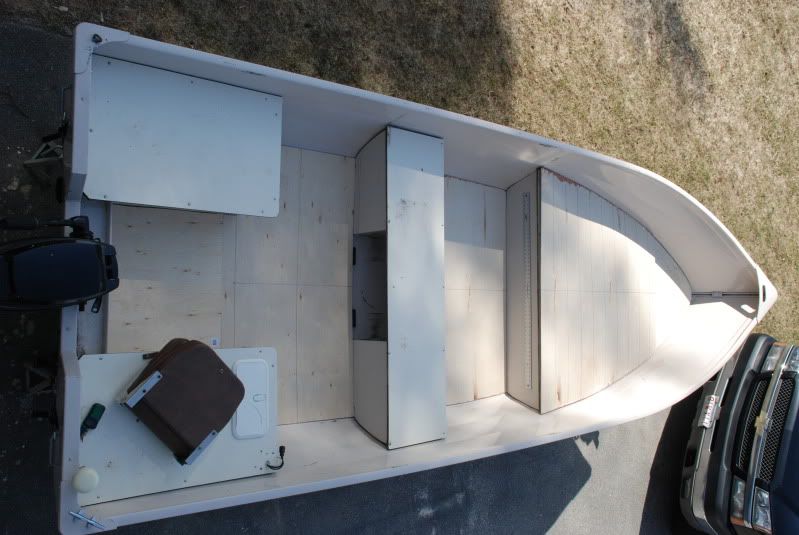
 
I layed the ribs out so there is a space to cut out for a 13" x 30" hatch in the bow section. The other hatches will be over the existing bench seats so I didn't have to plan for them in this portion of the build.

The dotted red lines show approximately where the underside of the deck will make contact with structural portions of the hull. The bow section will be screwed to the bulkheads that currently support the forward bench seat and a cross brace that is forward of the hatch cut-out. The mid section will simply rest on the chines and the aft section will rest on the chines and get screwed to a low bulk head near the aft of the boat (the dotted rectangle section)

RibsLayedOutjpg.png


The ply wood got a coat of epoxy and the next steps will be to coat the ribs with epoxy, lay in fillets and then overlay the ribs with 4" wide 17 oz biaxial tape. The bottom of the deck will be finished with a top sheet of 17 oz. biaxial cloth.
 
I used a pretty neat trick that I picked up from another boat building website that essentially adapted a cake decorating technique to the application of thickened epoxy. After thickening up some epoxy with a good bit of colloidal silica I scooped it into a plastic bag, squeezed it all to one corner and clipped the tip off of the bag:

DSC_0614.jpg


The thickened epoxy was squeezed out of the bag like a bead of caulk right into the corner between the underside of the deck and the ribs. It worked great! I was able to dispense all of a batch in a neat little bead right where it needed to be in a short amount of time. Getting the batch dispersed slowed down the "kick" of the epoxy and gave me plenty of time to smooth it into a nice fillet using the back side of a plastic soup spoon:

IMG_0424.jpg


IMG_0432.jpg


After I knock down all of the high spots with the grinder it'll get roughened up with some 150 grit sand paper and I'll start laying the biaxial glass over the ribs.

Go back up in this post and take a look at the "reference image" and think about this: I'm trying to come up with a good way to store 4 rigged 9 foot fly rods on the gunnels in the space between the top of the bench seats and the rail. My guess is it is going to involve some sort of custom fab and PVC tubes...but if one of you folks has a slick solution I would love to hear about it.
 
Well...my fillets turned out pretty nice but I was questioning wether or not the 1700 biaxial fabric would take the bend. I did a quick test with a bit of wetted out scrap cloth and came to the conclusion that there was no way the fabric was going to stay in contact with the ribs and fillets while the epoxy cured. The fabric was stiff enough to beat the surface tension of the epoxy and pulled up at the bottom of the fillet curve.

Solution: build up the fillets. I spent a bunch of time laying in thickened epoxy with a 1.5" disc of plastic that I cut from a broken windshield with a hole saw. Additionally I put a bunch of extra material in the corners of the ribs so that the fabric would see a gentle slope when it was applied.

I cut all of my pieces and proceeded to wet them out:

DSC_0625.jpg


They were laid in with care to be sure to get all of the bubbles out:

DSC_0627.jpg


DSC_0628.jpg


It worked well...and I learned a few things:

  1. 1700 is more flexible than 1708 (the material I have most the most experience with) but it still needs serious working to get it to take compound curves.
  2. A mall plastic scraper is the balls for spreading epoxy while wetting fabric.
  3. 65 degrees F is the perfect temp to be doing epoxy work.
 
There wasn't much interest in this thread but I thought I should finish it out:

DSC_0503-1.jpg


I'll share details if anyone is interested.
 
Wow! Very nice work. We get to see a lot of skilled craftsmen on this website, I think this is one of the best bulds yet. Simple but very good quality work and soooo Clean looking. It looks like one of the new Alumacraft Lunkers or the lowe V style boats.

I would get a bigger gas tank though! LOL.
 
chavist93 said:
You must not go far with a 25 and a 3gal. tank.


Nope, not far. The skinny water in New England salt is in close...and to fish that water is why I have that boat. I bet I will only fill that tank twice this year.
 
I'm interested in all you can share about this project. Would love to read/see the other upgrades you may be currently working on or have completed.

Thanks for sharing!
 
The requests for more info on this build happened a while ago and I'm truly sorry I have not responded until now. Better late than never I guess....

We left off with the ribs of the under-deck clad with a nice tight fitting layer of 1700. I learned that it is substantially easier to get a 5" wide strip of fairly thick glass to take a shape than it is to get a sheet the size of the part to take a bend every once-in-a-while:

DSC_0006.jpg


You will notice in the picture above that the ribs in the short direction have had some work with the grinder done. For the life of me I could not get the glass to lay flush with the ribs when it was a sheet that was the size of the deck part that I was working on. In order to save a bunch of epoxy and glass I cut the wet out piece of fabric in the middle of laying it down to get it to go flush. I chose the short direction on the part because stiffness was not as big an issue relative to the long axis. It is a bit messy looking but no one will ever see it...

Next I moved on to the top sides. All of the structural stuff was going on underneath so all I really needed was a thin layer of glass to give some wear resistance and waterproofing to the topside. I went with a very light 3 oz woven material:

DSC_0008.jpg


The raw wood got a thin squeegeed layer of epoxy before the wet-out layer of glass was laid down with some gentle tugging and a good working over with a laminating roller.

After the topside epoxy set up I gave it a good sanding with 100 grit paper, primed it with Rust-oleum wood and fiberglass primer from a rattle can and sanded it again with 100 grit paper.

The product I chose for the non-skid coating was largely directed by un-spent Cabela's points accumulate by paying for business trips with a Cabela's Visa:

TuffCoat.jpg


After working with this stuff and seeing the finished product all I can do is give it two huge thumbs up. It was tough to stir due to the high concentration of rubber non-slip grit in it...but that is a good thing.

IMG_0498.jpg


IMG_0494.jpg


IMG_0492.jpg


I raked on it with fingernails after it was cured and I could not get the little rubber nubbies to come up. Walking on it with bare feet was not painful. If it lasts a few years it will be well worth the cashed in points.

The finished product is a few posts up in this thread.

I have plans to add a second casting deck aft, basically taking up the whole width of the boat over the area where the two rear bench seats are. The motor will be set back about a foot on a jack plate and I'll add a grab bar so I can drive standing up. She is going to be one sweet skinny water platform to sight fish stripers from.
 
this project looks really awesome. i am really glad you chose to go ahead and add more pics and more explanation. i really like your work, first rate; and i didn't know there was such a product out there like that from cabelas. i will have to keep that stuff in mind. i imagine that the cabelas floor product alone should seal any wood. thanks again. skloak
 
Really great project. I'd be interested in your experience with the traction paint after having put it through some use now.

Thanks
 
The non-skid has held up well. Since it was installed I fished it 10 or so times in the salt (blood and guts) and 20 or so times in the fresh (catch and release) and it has withstood all of the washings and use.

I dropped the anchor on the deck during a salt trip and I had to touch up the ding but that has been the extent of it.
 
Nice work, really like the use of fiberglass to strengthen the ply rather than a bunch more wood.. or aluminum angle.. Do the ribs give it enough support to forego the use of additional crossbraces - or are they more of a way to eliminate flex?
 

Latest posts

Top