
BassBlaster
Well-known member
I havnt seen a "how to" posted on applying camo to a boat here yet so I decided I'll post my experience today. I'm no expert by the way. This was my first time but it turned out well.
I started by sandblasting my tin. Lots will tell you that sandblasting is not a good idea. I think otherwise but thats another story. After sandblasting, my project got held up for a year so my tin sat bare and oxidizing the entire time. Because of that, I spent multiple hours with a grinder and cup brush cleaning the oxidation off before painting. This step would not have been necissary had it not sat bare for so long. Next was Self Etching Primer. I used Rustoleum spray bombs. I used 5 cans. I applied 2 coats of primer to every area to be painted and let it set overnight. I then lightly sanded the primer with 220 grit. The primer said to use 400 grit but the paint said to use 220 grit. What gives, lol. I went with 220 because I had some on hand. I then blasted all the dust off with a blow gun on my compresor and hauled the boat out into the driveway. I wiped it all down with Mineral Spirits to be sure I had removed all the primer dust and let it dry. Now we are ready for paint!!
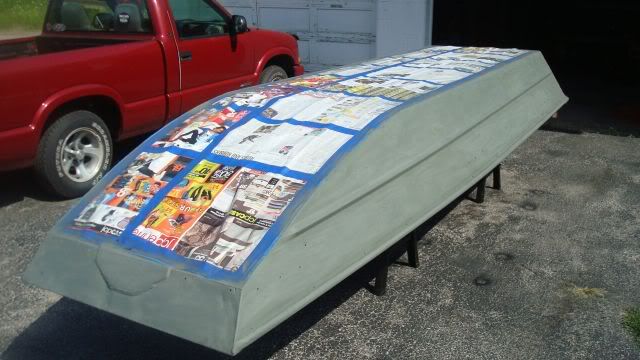
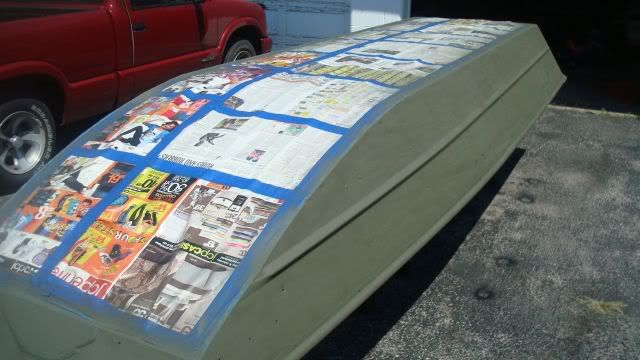
This is the primer sanded and cleaned and ready for the first coat of paint. The tape and newspaper are just keeping my new Steelflex from catching overspray...
For painting the camo, I ordered a stencil kit from Reelfoot Custom Camo. There are a ton of places that sell camo stencils but I couldnt find any I liked except for the ones at Reelfoot. They sell a couple different sizes in various patterns. The pattern were doing today is called "River Bottoms". I'll be using Krylon Ultra Flat Camo spray bombs.
The first step is the base color. My base color is Olive and I decided to give it 2 good coats to make sure I got complete coverage of the primer. It took about 6 cans.
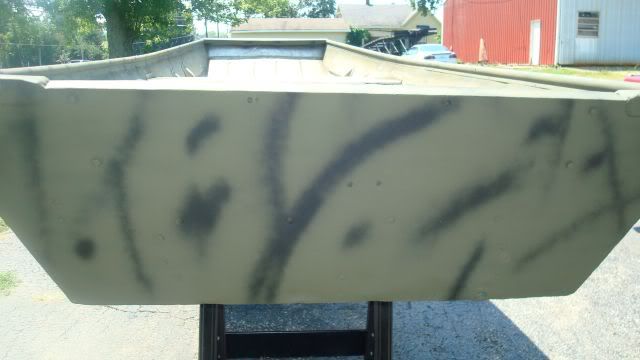
For the life of me, I can not paint with spray bombs without leaving a shadowing effect on the overlaps. Not to worry here though, next step...shadowing!!
For the shadowing effect, you just paint random blotches and lines in black. There is no method, it's completely random. Biggest issue here is just not getting to heavy with it wich I feel like I did in a few places. Were not painting here, just painting shadows that will be in the back of the pattern.
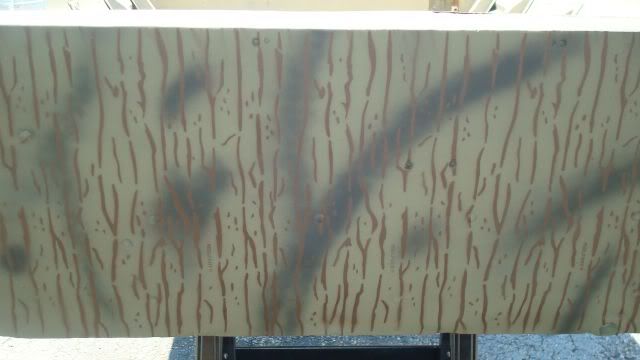
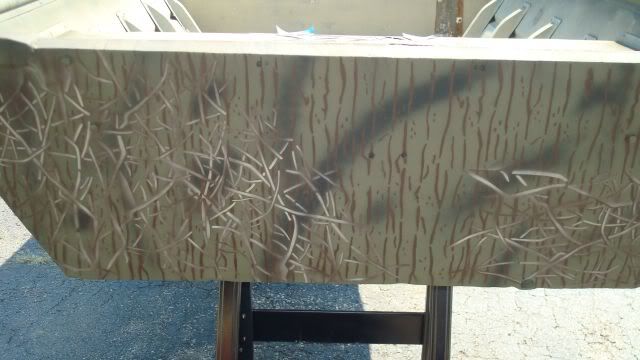
Now that the base is down and the shadowing is done, were ready to start with the stencils. Unless your using a duck boat specific pattern the first step is most likely gonna be "bark". The bark stencil needs to be overlapped so that it is continuous throughout the pattern. I tried using electrical tape per the instructions to hold the stencils but it wouldnt hold. Masking tape did the trick. The paint dries fast enough you can lift your stencil and stick tape to it almost imediately and you wont pull it off. You can get heavy with the paint here again so you get nice dark bark patterns. My color here is brown.
Now on to some more involved stencils. My next stencil is a "brush" stencil. This shouldnt be continuous like the bark but its up to you as to where and how much brush you use. Shoot the brush brown with dark heavy lines like you did the bark but before moving the stencil you need to highlight it lightly with another color. Just a quick mist to create a highlight. you dont want to cover all of your base color. The directions called for medium brown highlights but I didnt have that color so I used khaki.
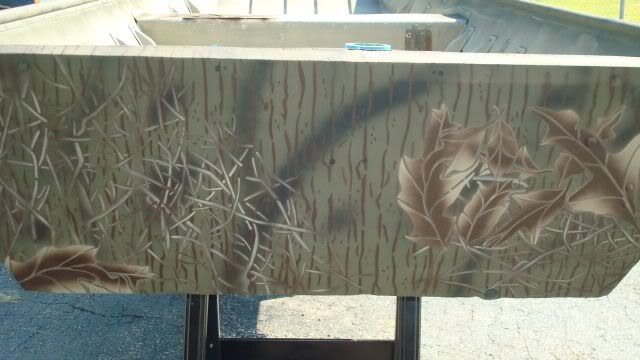
Now to the final step in my pattern, "leaves". This stencil really sets off the pattern I think. This is applied exactly like the brush stencil except you reverse the colors. Spray the leaves heavy and dark with the khaki paint and then stripe each leaf with the brown. I kinda gave it a light overspray and then hit it hard down the center of each leaf for a more 3 dimensional look. The instructions actually called for a shot of medium brown on each leaf before the dark brown but again, I didnt have that color. I still think they turned out okay.
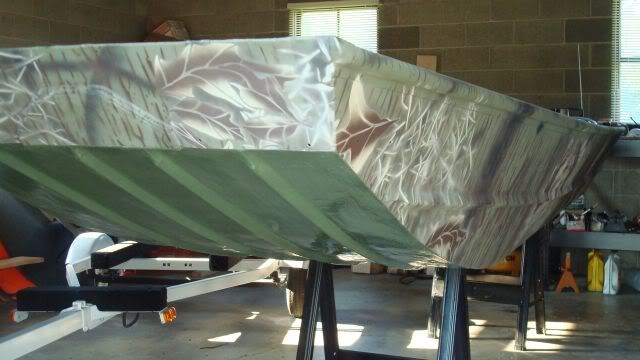
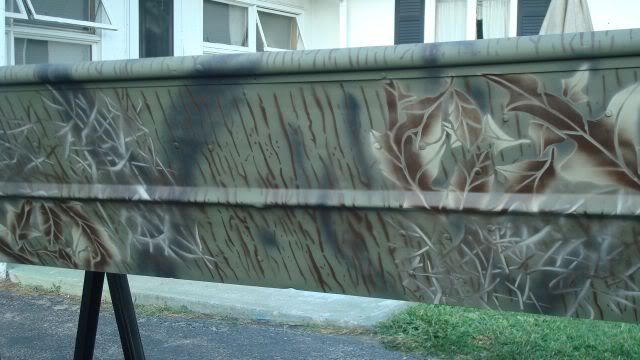
Here are the final results...
If you are using the same Krylon spray bombs that I used, the cans say it takes 7 days for the paint to completely cure and become scratch and chip resistent. Being that our tins usually take a pretty good beating, I'd give it the full 7 days before use.
Thanks for looking and please feel free to ask any questions or add to this thread.
I started by sandblasting my tin. Lots will tell you that sandblasting is not a good idea. I think otherwise but thats another story. After sandblasting, my project got held up for a year so my tin sat bare and oxidizing the entire time. Because of that, I spent multiple hours with a grinder and cup brush cleaning the oxidation off before painting. This step would not have been necissary had it not sat bare for so long. Next was Self Etching Primer. I used Rustoleum spray bombs. I used 5 cans. I applied 2 coats of primer to every area to be painted and let it set overnight. I then lightly sanded the primer with 220 grit. The primer said to use 400 grit but the paint said to use 220 grit. What gives, lol. I went with 220 because I had some on hand. I then blasted all the dust off with a blow gun on my compresor and hauled the boat out into the driveway. I wiped it all down with Mineral Spirits to be sure I had removed all the primer dust and let it dry. Now we are ready for paint!!
This is the primer sanded and cleaned and ready for the first coat of paint. The tape and newspaper are just keeping my new Steelflex from catching overspray...
For painting the camo, I ordered a stencil kit from Reelfoot Custom Camo. There are a ton of places that sell camo stencils but I couldnt find any I liked except for the ones at Reelfoot. They sell a couple different sizes in various patterns. The pattern were doing today is called "River Bottoms". I'll be using Krylon Ultra Flat Camo spray bombs.
The first step is the base color. My base color is Olive and I decided to give it 2 good coats to make sure I got complete coverage of the primer. It took about 6 cans.
For the life of me, I can not paint with spray bombs without leaving a shadowing effect on the overlaps. Not to worry here though, next step...shadowing!!
For the shadowing effect, you just paint random blotches and lines in black. There is no method, it's completely random. Biggest issue here is just not getting to heavy with it wich I feel like I did in a few places. Were not painting here, just painting shadows that will be in the back of the pattern.
Now that the base is down and the shadowing is done, were ready to start with the stencils. Unless your using a duck boat specific pattern the first step is most likely gonna be "bark". The bark stencil needs to be overlapped so that it is continuous throughout the pattern. I tried using electrical tape per the instructions to hold the stencils but it wouldnt hold. Masking tape did the trick. The paint dries fast enough you can lift your stencil and stick tape to it almost imediately and you wont pull it off. You can get heavy with the paint here again so you get nice dark bark patterns. My color here is brown.
Now on to some more involved stencils. My next stencil is a "brush" stencil. This shouldnt be continuous like the bark but its up to you as to where and how much brush you use. Shoot the brush brown with dark heavy lines like you did the bark but before moving the stencil you need to highlight it lightly with another color. Just a quick mist to create a highlight. you dont want to cover all of your base color. The directions called for medium brown highlights but I didnt have that color so I used khaki.
Now to the final step in my pattern, "leaves". This stencil really sets off the pattern I think. This is applied exactly like the brush stencil except you reverse the colors. Spray the leaves heavy and dark with the khaki paint and then stripe each leaf with the brown. I kinda gave it a light overspray and then hit it hard down the center of each leaf for a more 3 dimensional look. The instructions actually called for a shot of medium brown on each leaf before the dark brown but again, I didnt have that color. I still think they turned out okay.
Here are the final results...
If you are using the same Krylon spray bombs that I used, the cans say it takes 7 days for the paint to completely cure and become scratch and chip resistent. Being that our tins usually take a pretty good beating, I'd give it the full 7 days before use.
Thanks for looking and please feel free to ask any questions or add to this thread.


