Need some opinions on Steel Flex

TinBoats.net

Help Support TinBoats.net:

This site may earn a commission from merchant affiliate links, including eBay, Amazon, and others.

Lunker777

Active member
Joined
Apr 26, 2009
Messages
26
Reaction score
0
Hey there,

This is for all you guys that have used the product before. What is the best way to lay this stuff on ? I did a search and couldnt really find the EXACT answer I was looking for.

I want to hear from the people with experience with the stuff just because it looks like it can be a very UNFORGIVING product if not done correctly the first time ! After paying almost $150 for it, Im not messing this one up !
So the question is, what is the best way you have found to put steel flex 9X ( the cheap verison, not the teflon stuff ) on your aluminum hull ?

Thanks for any help !
 
Lunker777 said:
Hey there,

This is for all you guys that have used the product before. What is the best way to lay this stuff on ? I did a search and couldnt really find the EXACT answer I was looking for.

I want to hear from the people with experience with the stuff just because it looks like it can be a very UNFORGIVING product if not done correctly the first time ! After paying almost $150 for it, Im not messing this one up !
So the question is, what is the best way you have found to put steel flex 9X ( the cheap verison, not the teflon stuff ) on your aluminum hull ?

Thanks for any help !

Ok, mix the pigment into part 2, stir COMPLETELY. Then, make sure they are mixed 1:1 and very well. Mix in a separate container, then pour into ANOTHER container to avoid unmixed portions. Don't mix all of it at once, since it cures FASTER THAN FAST. Make sure it's at least 70 degrees out for good workability. Pour onto hull, use 4" foam roller for larger areas, and a not so decent brush to get into seams and smaller areas. It's not an easy product like paint,so it won't be perfect. Don't put too much on, as it will run. It will also level out, so don't panic. Again, you will have areas that just won't look great. Then again if you are using this stuff, you're more concerned with sealing than appearance, and it will do that very well. Don't work back over the area too much, get it on, move on.

Should cover it - let me know if theres anything else you need to know. Hope I remembered everything.
 
If you bought the cheap version and paid that much, I hope you got 2 gallons worth, because it should have only cost 1/2 that much.

Tips
1. Read the directions that came with it.
2. Use a soup ladle to portion your batch. (mine was stainless, and cleaned up spotless)
3. Whatever you plan on mixing your steelflex in, plan on throwing it away. I used a large plastic coffee can.
4. Make sure you use a roller that is specifically for solvents. Otherwise it will deteriorate during application. Use a disposable synthetic bristle brush.
5. Purchase 2 roller pads and 2 brushes.
6. Put on a light first coat and let it dry to a tacky state of masking tape, then apply second coat. (Mine took about 3 hours I think)
7. The heavier you pour on the product, the quicker it will setup (which equates to the harder it is to spread) so think "thin" as you apply it. I liked the results when I would "drizzle" the product on the boat and then spread it evenly with the roller.

Good Luck! Great product.
 
Brine said:
If you bought the cheap version and paid that much, I hope you got 2 gallons worth, because it should have only cost 1/2 that much.

Tips
1. Read the directions that came with it
2. Use a soup ladle to portion your batch.
3. Whatever you plan on mixing your steelflex in, plan on throwing it away. I used an empty large plastic coffee can.
4. Make sure you use a roller that is specifically for solvents. Otherwise it will deteriorate during application. Use a disposable synthetic bristle brush.
5. Purchase 2 roller pads and 2 brushes
6. Put on a light first coat and let it dry to a tacky state of masking tape, then apply second coat.
7. Pour out a little at a time. The heavier you pour on the product, the quicker it will setup.

Good Luck! Great product.

I guess I should have said Im from the great north. I paid the right price for it from Fasco, but after shipping, Plus once it got to my door I had a nice $40 charge for duty :evil: :evil: , It cost me roughly $150 canadian.
Now I read the directions, but I have noticed that the directions compared to what I have read on this forum are not quite in line with each other.

Now your saying I should put on 2 coats ? why ?
I know that the thicker the coating the faster it drys so dont lay it on thick ! But I have never heard of putting 2 coats on !

Thanks for the help
 
You want to get it on as thick as you can. It is just easier with this stuff to build it up with multiple coats. The thicker you can get it on your hull the better it is going to protect it.
 
Lunker777 said:
I guess I should have said Im from the great north. I paid the right price for it from Fasco, but after shipping, Plus once it got to my door I had a nice $40 charge for duty :evil: :evil: , It cost me roughly $150 canadian.
Now I read the directions, but I have noticed that the directions compared to what I have read on this forum are not quite in line with each other.

Now your saying I should put on 2 coats ? why ?
I know that the thicker the coating the faster it drys so dont lay it on thick ! But I have never heard of putting 2 coats on !

Thanks for the help

Shipping charges "eh"? Wow :shock:

I say to put on two coats because that's what Jerry at Fasco recommended I do. I assume like most paint/epoxy applications, multiple light coats almost always yield better results than 1 heavy..

When you say "But I have never heard of putting 2 coats on !" I think it's safe to say....."That's OK!" No need to get panicky! :lol: In your search, I figured you would have found my build: https://www.tinboats.net/forum/viewtopic.php?f=13&t=6551&start=50 and didn't mean to get you worked up.

In the meantime, I'm sure there are folks who only put one coat on as well and I assume the product is working well for them. If you want clarity, call and speak to Jerry at the number you called to order the product and get his opinion, and while your at it, post back what you hear and maybe it will help another member someday!
 
use an expensive roller so the nap doesn't end up in your epoxy.

I also only used one coat works like a champ.
 
Thanks for all the help everyone

I have one more question....

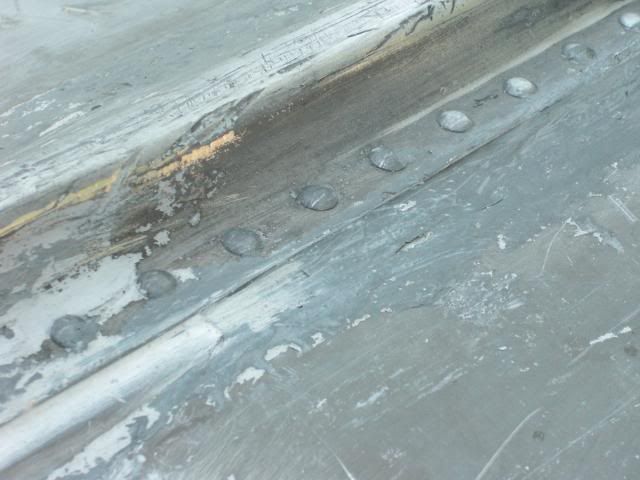
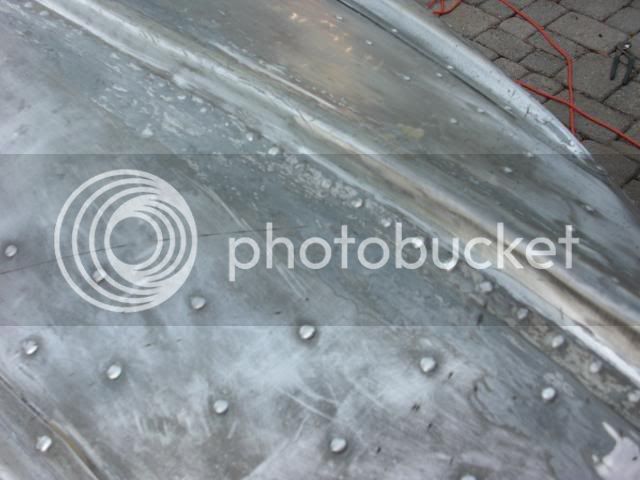
The guy that had it before me must have put a bunch of bondo or something on the seams at the front.... would it be best to remove all this stuff before adding the Steel Flex ??? the stuff is on there pretty solid... it takes an effort to get whats there off...

Here are some pics to show you what Im talking about... It might be a little tough to see. ..

CIMG0455.jpg

CIMG0456.jpg
 
No reason to take it off if it is on there good. Just make sure to scuff it up (like the rest of the boat) to ensure the steelflex will bond to it.
 
Just as a follow up.....On page 2 of 3 of my directions under APPLICATION it reads

9X STEELFLEX will tend to sag on vertical surfaces unless applied in thin coats. Allow first coat to "tack up" for about 2 hours before applying second coat.

Curious...did you get different directions than me :?:
 
Brine said:
Just as a follow up.....On page 2 of 3 of my directions under APPLICATION it reads

9X STEELFLEX will tend to sag on vertical surfaces unless applied in thin coats. Allow first coat to "tack up" for about 2 hours before applying second coat.

Curious...did you get different directions than me :?:

I actually didn't see that with mine - and it would have helped. Next time that's what I'm doing to avoid the runs I have, oh well.

Also, I tried to get my boat complete bare, and it took A LOT of time. It might have been unnecessary, but I didn't care. I had similar stuff to that on my first build - I used a heat gun and scraper and it came off. I think Jerry said that if you just scuff it up it will be fine to coat over it, though.
 
i also did two coats. like everyone said. THIN!!! i was surprised at the transperancy mine had. i could still see some of the darker stuff that i didnt take all the way off.but its on the bottom so i dont care. i do not think i will have a leak issue anymore. good stuff.
 
Steel Flex really should be a sponsor on this board - with all the business this place has given them. Maybe even a 10% discount if you mention Tinboats.net. :wink:
 
Brine said:
Just as a follow up.....On page 2 of 3 of my directions under APPLICATION it reads

9X STEELFLEX will tend to sag on vertical surfaces unless applied in thin coats. Allow first coat to "tack up" for about 2 hours before applying second coat.

Curious...did you get different directions than me :?:

I just read the blue book that came with it ! haha I didnt even see those pages till I went and looked at all the stuff again !

I guess the best thing to go would just be to have at'er and get it done.... I worry about things to much haah
 
Lunker, Brine has it right. I just came up to clean up after finishing my Steel Flex application. Here are a few pics. I ordered 2 quarts based on Jerry's (at Fasco) recommendation. I was worried when I got it that it wouldn't be enough for my 1436 Sea Nymph, but it worked out perfectly with a little to spare. I came up the sides a couple of inches, and covered about 6 inches up the transom. Since mine came in 4 containers ( 2 each parts 1 and 2) plus grey tint, I just mixed two cans for the first app. with 1/2 the pigment in a plastic buchet. Brine's "drizzle" method was the ticket. Just pour it out. It took about three hours to set up to a tacky finish. It was about 70 degrees and I was inside my workshop, with garage door open. Second coat went on a little thicker, especially in the areas that I believe will get the most wear. The only thing I would have done differently was use a foam roller. I did buy a high quality, solvent resistant roller, but I still got fuzzies in the finish. Step back a few feet, can't see it. I didn't need to use a brush at all, just the roller. I let it sit for an hour and pulled off the masking tape. No runs!! Good luckJon boat pics II 019.jpg
 

Attachments

  • Jon boat pics II 002.jpg
    Jon boat pics II 002.jpg
    45.2 KB · Views: 954
  • Jon boat pics II 008.jpg
    Jon boat pics II 008.jpg
    47.4 KB · Views: 954
  • Jon boat pics II 011.jpg
    Jon boat pics II 011.jpg
    41.3 KB · Views: 954
  • Jon boat pics II 018.jpg
    Jon boat pics II 018.jpg
    90.7 KB · Views: 954
what kind of pad is that on the 4" grinder??? If its a scuffing pad, where did you get it? Thanks alot.
 
Crewcab. The pad is 80 grit, and I got it at Home Depot, for about $5 or $6. It's like sandpaper flaps, and it's more than a buffing pad. It will QUICKLY remove paint. You have to keep it moving. If you only need to scuff up existing paint, it's a little too coarse. I wanted to pretty much strip down the bottom to bare metal, and it did that. Avoid the rivets, as it will wear them down quickly.Touch up around the rivets with the wire wheel. This one pad did the bottom of my boat, took two wheels.
 
cullen said:
does that seal the boat from leaks

it helps - you really need to buck the rivets first if you know they leak - but, if this stuff is put on right it sure does help
 
Top