BigTerp's Tracker Sportsman 16' O/B Jet build

TinBoats.net

Help Support TinBoats.net:

This site may earn a commission from merchant affiliate links, including eBay, Amazon, and others.
Thanks Vermonster, sounds like a plan.

Going to get some work done on her this weekend finishing up some rivet removal, some cleaning and sanding/priming were needed. Then it will be time to gather everything I need to put her back together and get the new transom in place.
 
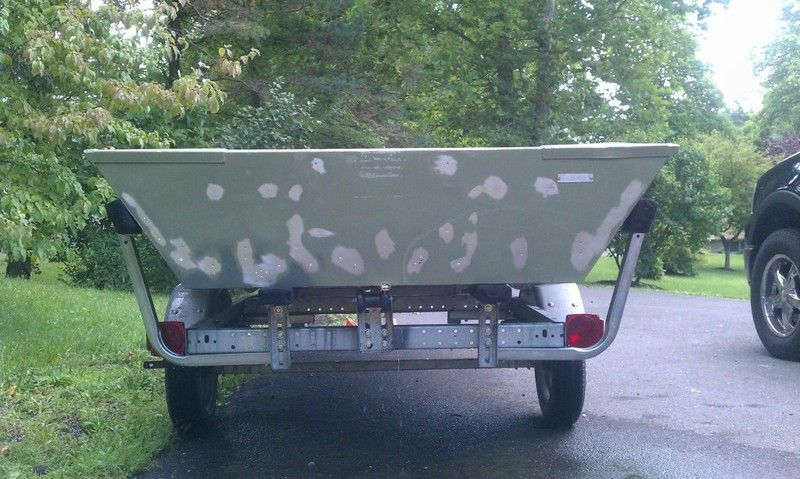
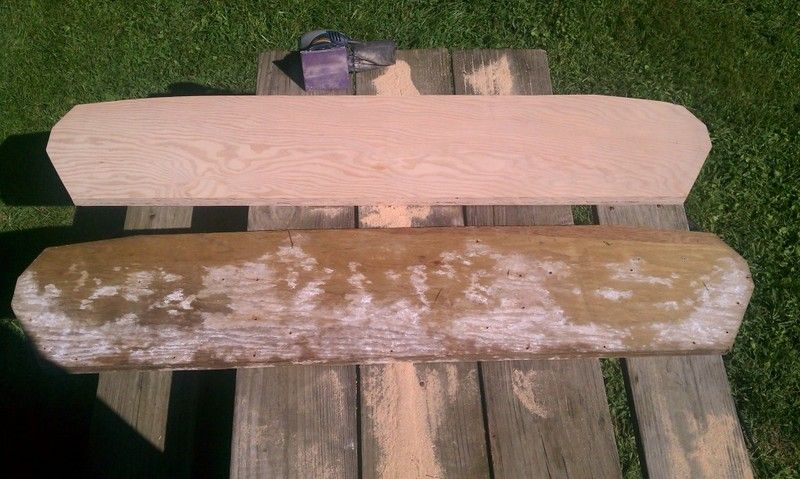
Got a little bit done this past weekend. Removed the rest of the rivets from the transom, sanded each rivet hole on the outside of the hull, drilled out any "whallowed" out holes to 1/4", wire brushed then sanded entire transom area to remove oxidation/corrosion, primed the entire transom area, shop vac'd and pressure washed (again) the inside of the hull. Seems like I finllay got all the gunk out of her.

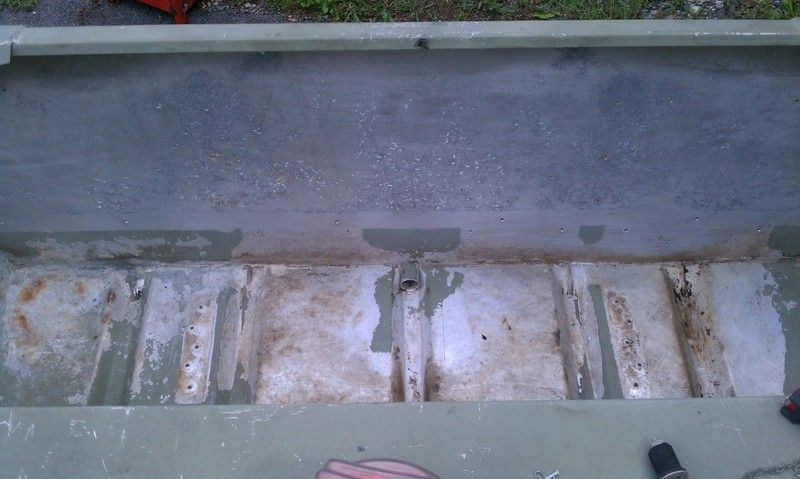
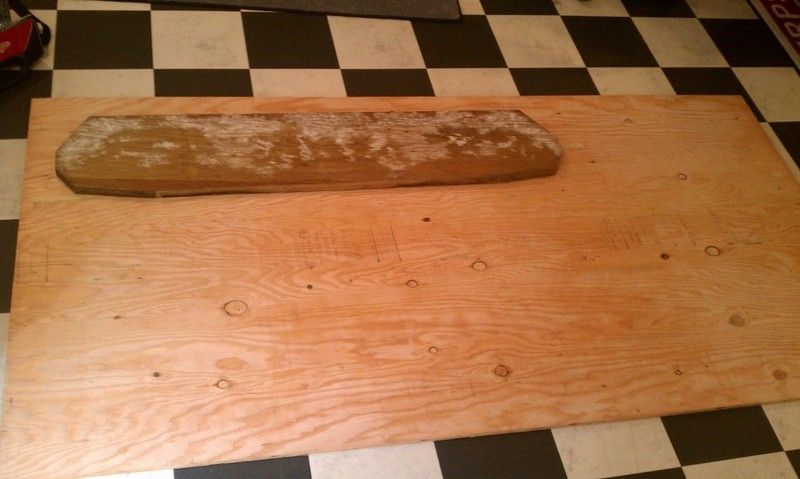
Obviously the old transom board was a bit leaky. After removing all the oxidation/corrosion with a wire brush and sanding, you could see how pitted the aluminum behind the old transom board was. I sanded it down from 60 grit to 220 grit then pressure washed it, cleaned with acetone and applied 3 coats of self-etching primer.
IMAG0560.jpg


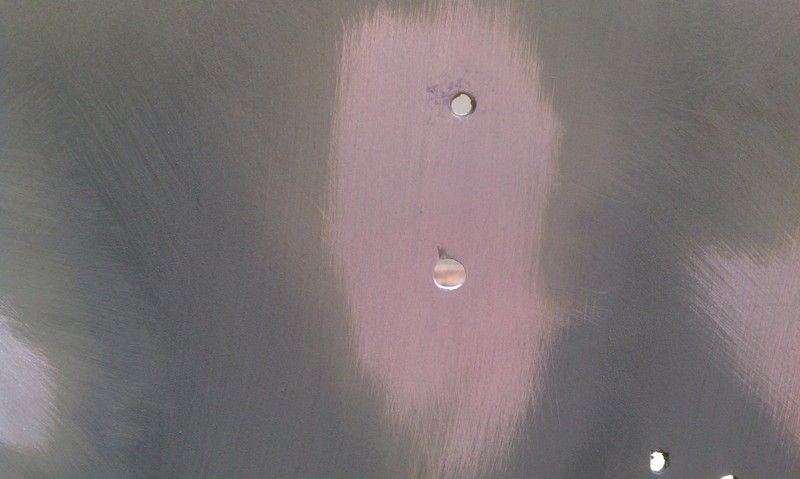
A closer look at the pitting
IMAG0559.jpg


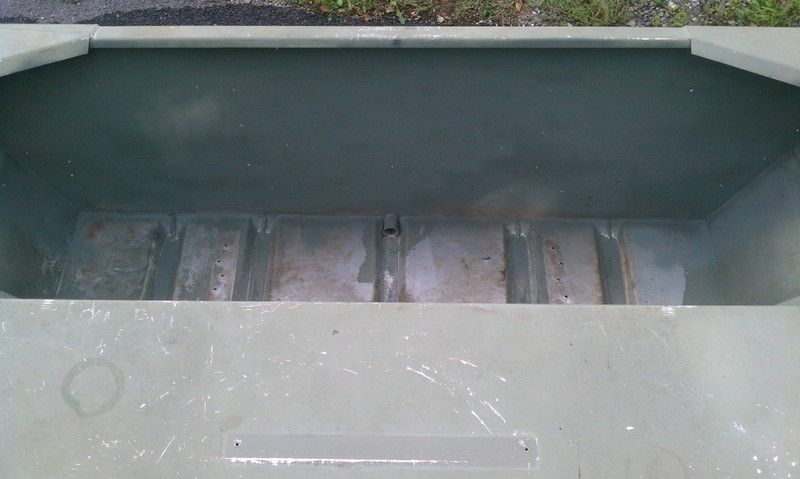
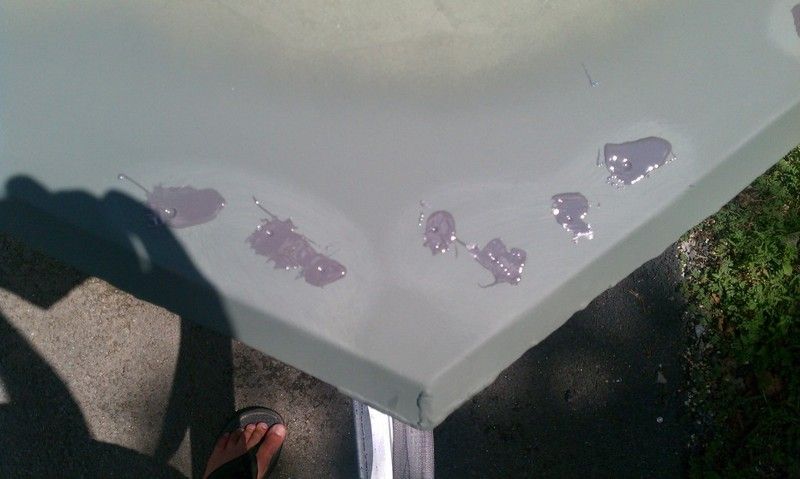
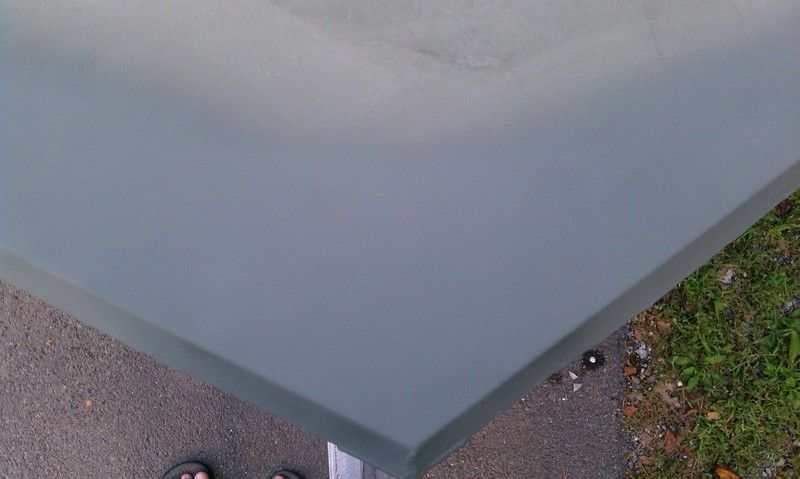
After sanding, cleaning and primer. I'll probably eventually hit the floor of the hull with some sand paper and primer as well.
IMAG0562.jpg


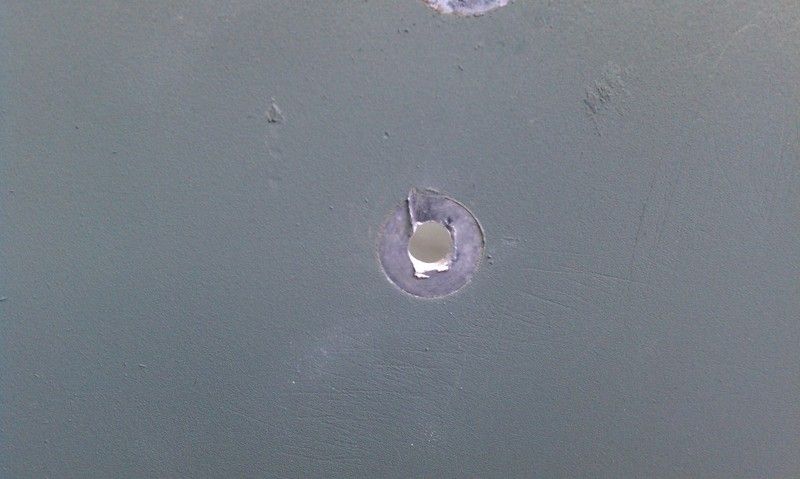
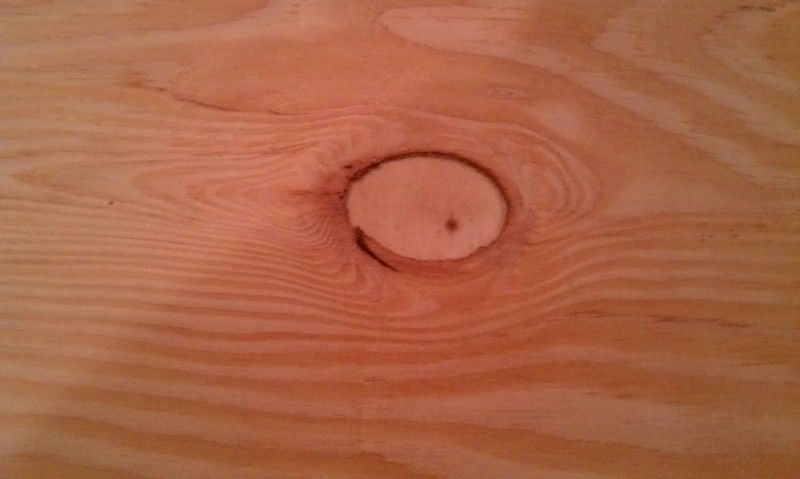
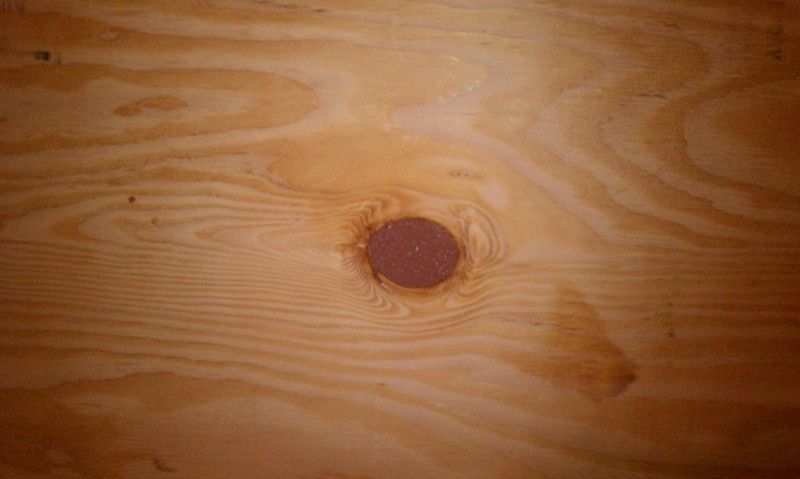
This is one of the holes that I marred up pretty good with the screwdriver while removing rivets and whallowed out the hole a bit. I drilled it out to 1/4". I then sanded it down until it was deburred and smooth to the touch. Ended up doing this to about 7 or so holes. I think it turned out pretty good, expecially when you compare it to the before picture.
IMAG0556.jpg


Before
IMAG0554.jpg


Transom holes deburred, drilled out, sanded and cleaned. Ready for some fresh new rivets and stainless hardware.
IMAG0561.jpg


It seems like I have done a good bit of work already, but not getting very far along. I know this part is some of the more tedious work I'll be doing, so slow progress should be expected. Once I get the new transom back in place I can start planning out and working on the rest of the boat.

Upcoming plans include:
-Ordering rivets, air hammer and stainless hardware for transom replacement
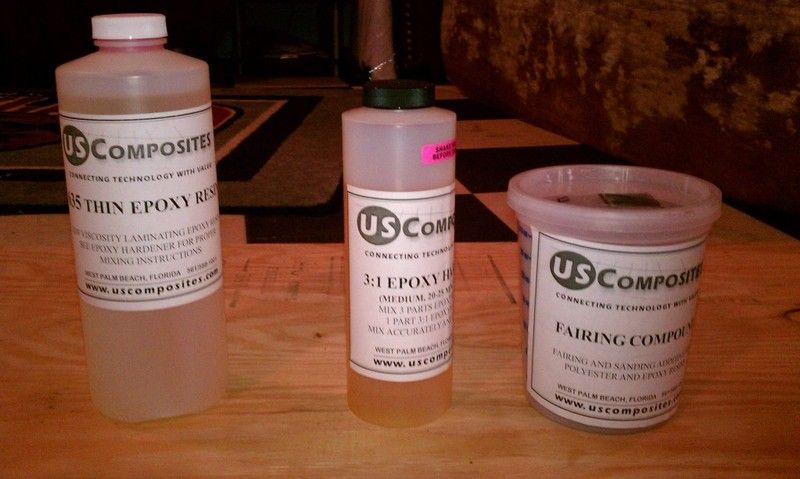
-Ordering epoxy resin
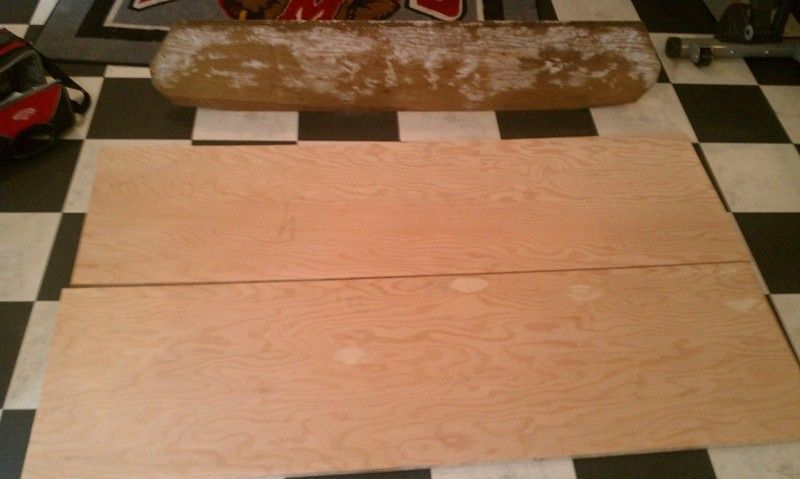
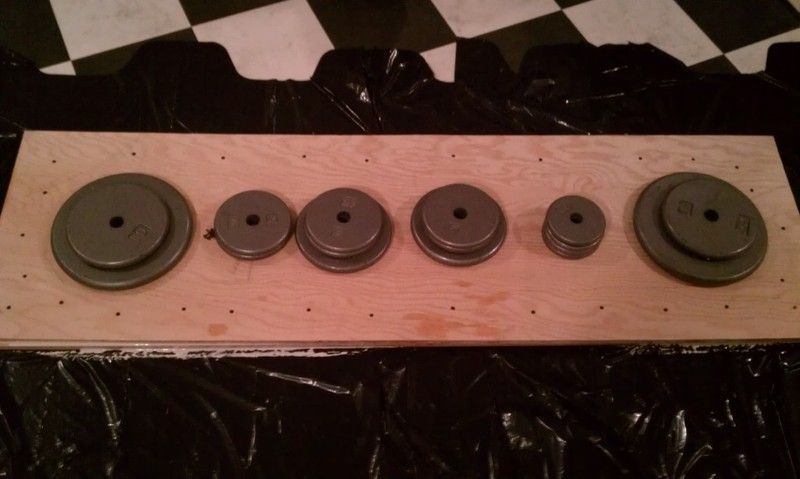
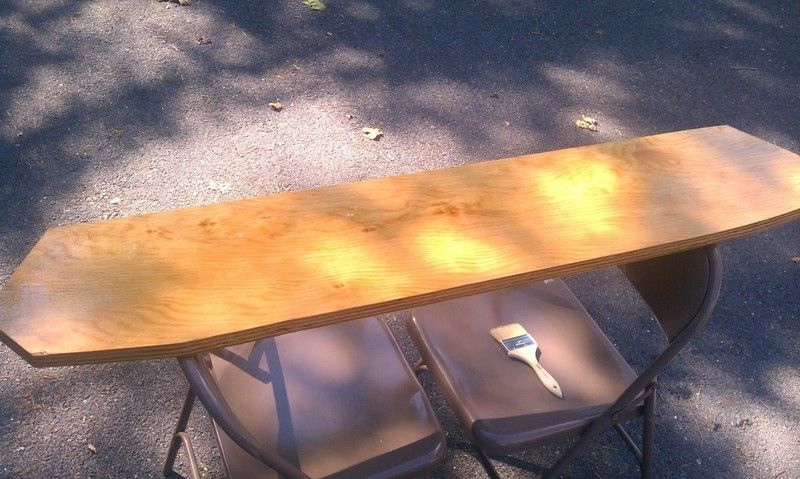
-Pick up wood for transom and getting it cut, glued and drilled out
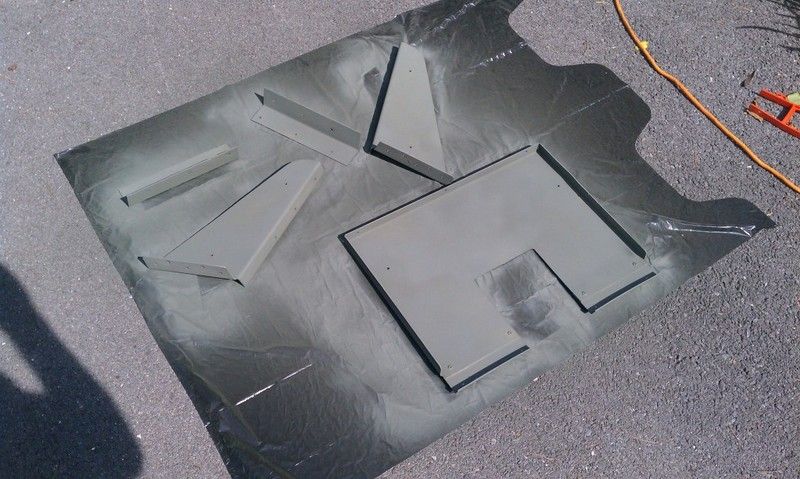
-Cleaning up, sanding and primer for all peices of the transom bracing
-Cleaning up , snading and primer for hull floor from back bench seat to transom
-Reassemble transom

NEVER ENDING............
 
Looking good Big Terp. I'm about 2 steps behind you. I bought all my supplies this weekend, except wood and I'm gonna start on the steps you just completed. What type of wood are you using?
 
panFried said:
Looking good Big Terp. I'm about 2 steps behind you. I bought all my supplies this weekend, except wood and I'm gonna start on the steps you just completed. What type of wood are you using?

I've been keeping my eye on your build. Looking good!!

I've been getting alittle behind. I was sick all last week, and our AC/Heat Pump took a crap last weekend. So I've been holding off on ordering anything for the boat until we get the AC situation squared away. Ended up being a bad control board on the inside unit. Hopefully that will be getting fixed this week, and I can then get back to the boat.

I did do a little work yesterday. I cleaned up the bilge area and sanded out all the corrosion. Hit it with a few coats of self-ethcing primer. Also worked on cleaning up all the transom bracing. Need to finish getting those sanded up and rivet ends popped out. They seem to be stuck in the bracing worse than they were the hull.

So I haven't ordered any of what I need to finish the transom. But I plan to use exterior grade, or I guess the ABX plywood that either Home Depot or Lowes carries. My transom is 1-1/4" wide. Kind of an odd number it seems. I haven't been out to either place to see what brand of plywood or what thickness they carry. But I'm hoping to find some that has the right thickness so I can glue 2 pieces together to make the 1-1/4" I need.
 
If you go to a builder's supply or Ace Hardware that has lumber, you should be able to get plywood made in USA with USA sizes. A single sheet of 5/8" cut up and doubled will make that transom thickness you need nicely and will likely only cost around $20.00 or so. A few phone calls around your area to various suppliers (Not Home Depot or Lowe's) will likely locate the needed plywood.

You might want to consider applying Goop Coat-it on the corrosion on your hull where the transom was. It's only $20.00 for a quart of Coat-it at Academy Sports, a very good value. Looking at what the product contains, it is an epoxy and appears to be ideal to use not only to prevent leaks, but as transom coating as well. A quart should coat your transom wood with enough left over to cover the pitted areas. Here's a link:

https://www.academy.com/webapp/wcs/stores/servlet/Product_10151_10051_500045_-1?Ntt=Coat-It&Ntk=All
 
DaveInGA said:
If you go to a builder's supply or Ace Hardware that has lumber, you should be able to get plywood made in USA with USA sizes. A single sheet of 5/8" cut up and doubled will make that transom thickness you need nicely and will likely only cost around $20.00 or so. A few phone calls around your area to various suppliers (Not Home Depot or Lowe's) will likely locate the needed plywood.

You might want to consider applying Goop Coat-it on the corrosion on your hull where the transom was. It's only $20.00 for a quart of Coat-it at Academy Sports, a very good value. Looking at what the product contains, it is an epoxy and appears to be ideal to use not only to prevent leaks, but as transom coating as well. A quart should coat your transom wood with enough left over to cover the pitted areas. Here's a link:

https://www.academy.com/webapp/wcs/stores/servlet/Product_10151_10051_500045_-1?Ntt=Coat-It&Ntk=All

Thanks Dave!! I called a local lumber company this morning and located some exterior grade, non-pressure treated plywood. They only have 1/2" and 3/4" though. They are checking on ordering me a sheet of 5/8", waiting to hear back on a price. Worst case I can use the 1/2" and 3/4" to make the thickness I need. I just don't think it would be very economical to buy 2 sheets of different sizes, so hopefully they can get in some 5/8" for me at a decent price. We have a local Fastenal and I plan to stop buy later this week and pick up the stainless hardware I need for the transom.

Thanks for the link, although I'm pretty set on using the US Composites epoxy resin on the transom. Do you think the sanding, cleaning and primering of the transom was enough to prevent further pitting? If not, could I throw some of the US Composites expoy resin on there before I install the transom wood?
 
Thanks for the link, although I'm pretty set on using the US Composites epoxy resin on the transom. Do you think the sanding, cleaning and primering of the transom was enough to prevent further pitting? If not, could I throw some of the US Composites expoy resin on there before I install the transom wood?

I don't know, but after reading the container and reviews on the net, if I had to do it over I'd use Coat-it. It has epoxy in it along with very good reinforcing ingredients. You might want to research it further.
 
Thanks again Dave. I'll be sure to check out the Coat-It before I make a decision.

So my local lumber yard has Marine grade plywood bot only in 1/2" and 3/4". Pretty pricey as well, $67 and $85. So I asked if they had any non-pressure treated exterior grade and they do have 5/8" A-C Fur for $35 for a 4x8 sheet. I'll be going with this. Not quite as nice as the marine grade, but I'd have to buy 2 sheets of the marine grade for about $150, doesn't make sense. Plan on picking up the plywood tomorrow morning and getting it cut and glued later this week/weekend.

So when glueing my 2 pieces together do I want to glue the "C" sides together or glue an "A" side to a "C" side?
 
In red per usual:

BigTerp said:
Thanks again Dave. I'll be sure to check out the Coat-It before I make a decision.
Cool
So my local lumber yard has Marine grade plywood bot only in 1/2" and 3/4". Pretty pricey as well, $67 and $85. So I asked if they had any non-pressure treated exterior grade and they do have 5/8" A-C Fur for $35 for a 4x8 sheet. I'll be going with this. Not quite as nice as the marine grade, but I'd have to buy 2 sheets of the marine grade for about $150, doesn't make sense. Plan on picking up the plywood tomorrow morning and getting it cut and glued later this week/weekend.
I think you made a good purchase decision.
So when glueing my 2 pieces together do I want to glue the "C" sides together or glue an "A" side to a "C" side?
Just use Titebond III and stainless steel screws and glue/screw it together. The glue will do the rest. If you decide to epoxy and want to get a nice wood appearance, leave the prettier side of the plywood out. Don't over think the glue process, it's pretty basic, as long as you make sure it's got plenty of glue and have a rag in a pan/dish of water to wipe any spills squeeze out up. Make sure and fill any voids in the plywood you have after cutting with epoxy mixed with sawdust to make a peanut butter like filler. Mix your epoxy right on the wood in most cases, get it smeared out, then repeat.
 
Was able to squeeze in about a half days worth of work on Saturday. Being sick, busy, rain and AC problems has really slowed me down. AC gets fixed today and I'm just about over my nasty cold. Getting back on track now 8)

Got the plywood measured and cut. Cut oversized rectangles to allow for errors in measuring and room for a final cut after glueing. Waiting on my epoxy resin to come in so I can fill the plywood voids. Then I can get this thing glued and cut to size. Went with 5/8" A-C exterior grade fir.

IMAG0570.jpg


IMAG0571.jpg


Dealt with the holes above the water line from the previous owners screws holding in TM bracket, seats and fish finder. Used JB weld in 2 coats. Will be getting those sanded and primed later this week. Purely a cosmetic thing.

Here is the first coat on the bow were the old TM bracket was.
IMAG0575.jpg


Also sanded all the corrosion and oxidation on all the pieces for the transom bracing, then hit 'em with some primer. Did the same to the gas tank holder.
IMAG0577.jpg


Still need to get my rivets and air hammer ordered, planning on doing that today. I've got everything else I need to finish the transom once my epoxy resin is delivered. Got a 50 piece bag of stainless steel bolts, 50 piece bag of nyloc nuts and a 100 piece bag of stainless steel washers from Fastenal. Was planning on spending about $30 on all of that. Walked in and found a guy I played baseball with in college is the manager. Gave me his discount and ended up getting all of that for $6!! NowI just need to see what else I can source from Fastenal.
 
So next up is to get this **** transom finished and installed!!!

Then I'll be removing the middle bench and probably doing some painting. The original paint isn't in horrible shape, but is obviously aged and beat up in the common places (outside hull, rail, etc.), so I figured while I'm at it I might as well give her a brand new paint job. Since I'll have to be sanding and priming these problem areas should I go ahead and just strip the entire boat and start from scratch? Not trying to make it perfect, but do want it to last.

As far as paint goes, I'll be going with RustOleum high performance protective enamel. I'm thinking of doing the outside hull halfway up the sides in hunter green and the rest of the outside hull and interior in smoke gray. Let me know what you guys think. https://rustoleum.com/CBGProduct.asp?pid=130

After removing the middle bench, which houses a small livewell, I'll need to plug the livewell drain which comes out the side of the hull right at the junction of the bottom and side. Whats the best way to do this? I'm assumming have it welded over with a small piece of aluminum sheet.
 
Give me a yell sometime, we'll go wet a line and I'll ruin you towards outboards. River's up a bit but the fish don't mind. Lots of green trash floating. I work through Sunday, should hit it Monday or Tuesday weather willing.

For your boat, eBay your stainless as Fastenal's prices have gotten outrageous.

Paint or epoxy your wood before installing it. You can cheat and use carriage bolts through the transom, just seal them well as you push the bolt through the hull and wood. Stringers can get welded to the floor, Center seat livewell makes great dry storage if you just get a spare hull plug. Spring Mills WalMart has a decent boat parts stock.
 
Thanks Jamie. And that's all I need is for you to steer me towards a jet!! My wife would be thrilled :roll: I'll give you a shout here before to long about welding up my drain hole and hitting up the river. Haven't done much fishing this summer. Just a bit of catfishing on the upriver side of the old railroad bridge. Been pretty good bites though.

I already got my stainless hardware from Fastenal. An old college buddy of mine manages the one in Hagerstown and he gave me his discount. Ended up getting all my nuts, bolts and washers for $6!! I'll be using epoxy resin on the transom wood and some 3M 5200 to seal up the stainless hardware and rivets.

Everything is scheduled to be delivered by the end of the week (air hammer, rivets and epoxy resin). So hopefully I can spend the better part of the weekend getting the transom knocked out.
 
Was able to get a little work done last night. Finished patching all the screw holes and primering. Man that JB Weld is a PITA to sand!! Got my expoxy resin in yesterday so I went ahead and mixed up a batch with the fairng compound and filled the voids in my plywood. So far the stuff seems pretty easy to work with. Will be sanding that down to level this evening and getting my boards glued together. I'll throw up some pictures after the weekend. Hopefully I can at least have the transom wood ready to be mounted. Harbor Freight won't have my air hammer delivered until later next week. So I'll have to wait to install the transom wood until then.
 
BigTerp said:
So next up is to get this **** transom finished and installed!!!
You'll be glad when that's done. I was for sure.

Since I'll have to be sanding and priming these problem areas should I go ahead and just strip the entire boat and start from scratch? Depends on how much work you want to do. If you're going to remove the old paint completely, I would suggest using some Bix Stripper. Works as well as aluminum stripper on the paint and costs less. Less labor for you. Be sure and use lots of water, high pressure if you have it, to rinse all the acid of the stripper off.

As far as paint goes, I'll be going with RustOleum high performance protective enamel. I'm thinking of doing the outside hull halfway up the sides in hunter green and the rest of the outside hull and interior in smoke gray. Let me know what you guys think. https://rustoleum.com/CBGProduct.asp?pid=130
I think a lighter color grey is a great idea, as is a tan. Depends upon heat in your area. I actually used that hunter green in my boat and I love the color, but that color and tan are hard colors to find boat seats in. Before you make a decision on your colors, take a look at boat seat colors color combo availability and make your color decision to match your favorite brand of boat seats. BTW, Home Depot sells that brand of paint and if you get a gallon of the white, they are happy to custom mix it to a color you want if they don't have the color you want. I got my tan/sand color by picking out a color from a pile of those paper color swatches the lady there suggested I pick from. It looks great.

After removing the middle bench, which houses a small livewell, I'll need to plug the livewell drain which comes out the side of the hull right at the junction of the bottom and side. Whats the best way to do this? I'm assumming have it welded over with a small piece of aluminum sheet.
Yes, that's the best way. Second best and other alternatives are riveting with sealer or placing a scupper plug there (I would do this in case I put the seat back in). Google scupper plug for examples.

Hope this helps.
 
Thanks Dave!! Yeah, the transom work has been SLOW and tedious. I'm looking forward to getting it done and being able to move forward with the boat.

I think I'm just going to sand down the problem areas on the boat and give the rest of it a nice scuff and then paint. The original paint isn't horrible, just rather faded and dull looking. So instead of having to deal with all the extra work of stripping I'll just do the best prep I can without fussing with stripping.

Thanks for the heads up on Home Depot being able to color match the RustOleum professional. Thats awesome!! Makes my color choices almost limitless.

For the drain plug I already talked to Jaime (Ranchero50) about welding a piece of plate on for me. He only lives a few minutes away, plus I'll get to check out that sweet jet ski tin he built!! Good idea on using a plug though. I may just pick up a drain plug from wally world and run the boat a bit without the seat before I get it welded shut, just incase I decide to put it back in.

I ended up going with the US composites epoxy resin instead of the Coat It you suggested. So far it has worked well, but I've only mixed up one batch with the fairing compound to fill a few voids. I'll find out this weekend how good it works once I start coating the transom wood.
 
Was able to get a bit done over the weekend. It was rainy, but Saturday ended up being a decent day to get some stuff done outside. The rest of the weekend I spent sanding and applying epoxy in our rec room. Even cleaned up the mess before my wife saw it!!

Got the bow and bench seat holes plugged, sanded and primed. Here is how the bow turned out. The rest turned out just as good.
IMAG0583.jpg


Before
IMAG0524.jpg


Got a good bit of the transom work knocked out as well. Here is the voids on the C side of the plywood that had to be filled.
IMAG0581.jpg


Epoxy. Went with US Composites thin epoxy with medium hardener.
IMAG0582.jpg


Voids filled and sanded. Had about 5 of these to do.
IMAG0587.jpg


Used Titebond III for my wood glue. Pretty good stuff.
IMAG0588.jpg


Glued, screwed and weighed down.
IMAG0590.jpg


Wood cut to size. Isn't quite perfect, but should work just fine. It's just a hair short on one of the corners which may make getting a bolt through the transom wood a bit difficult. It is one of the top bolts above the waterline, so hopefully it won't be a problem.
IMAG0592.jpg


First coat of epoxy resin. Stuff is pretty easy to work with. Was only able to get one coat on since I can only do one side at a time. The cooler weather over the weekend and having to let it cure inside at about 70 degrees really slowed down the cure time.
IMAG0594.jpg
 
I'll be sanding and finishing the final 2 coats of epoxy resin on the transom board over the next few days. Hopefully I can get that done before I leave for the beach on Thursday. My Harbor Freight air hammer is due to be delivered on Wednesday, so I'll have to wait until I get back from the beach to FINALLY be able to install the transom wood. Then I'll be able to get her on the water and she how she fishes. Should help me decide on my final plans.
 

Latest posts

Top