1959 Duracraft V-Hull Project

TinBoats.net

Help Support TinBoats.net:

This site may earn a commission from merchant affiliate links, including eBay, Amazon, and others.

jdspringr07

Member
Joined
Oct 30, 2013
Messages
18
Reaction score
0
Location
Nebraska
Hello All!

First off, I've been reading trough these forums for the past few months and ultimately you all inspired me to purchase my first project (my wife says thanks btw! :lol: )

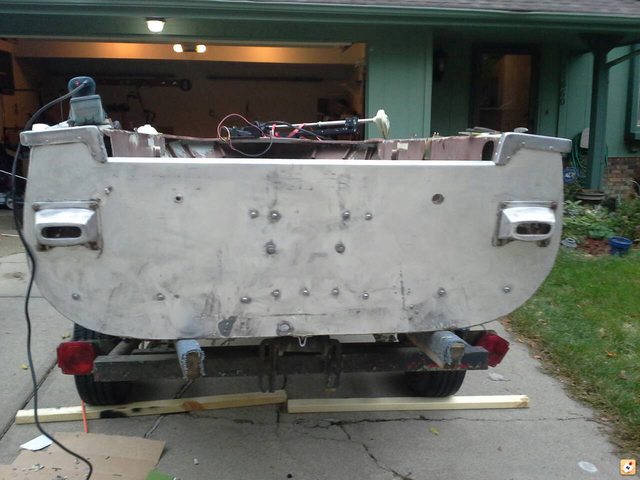
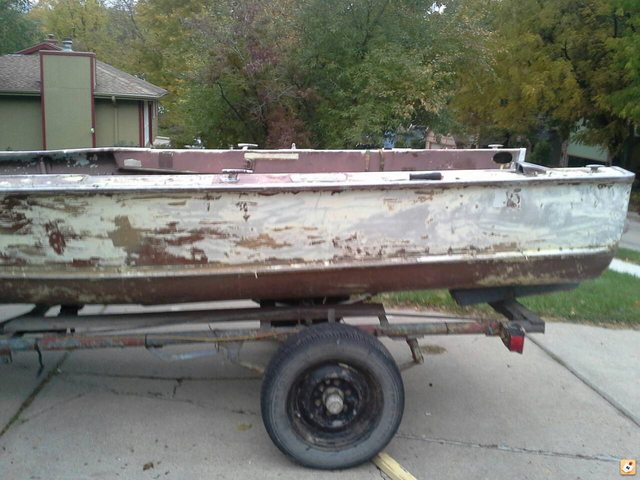
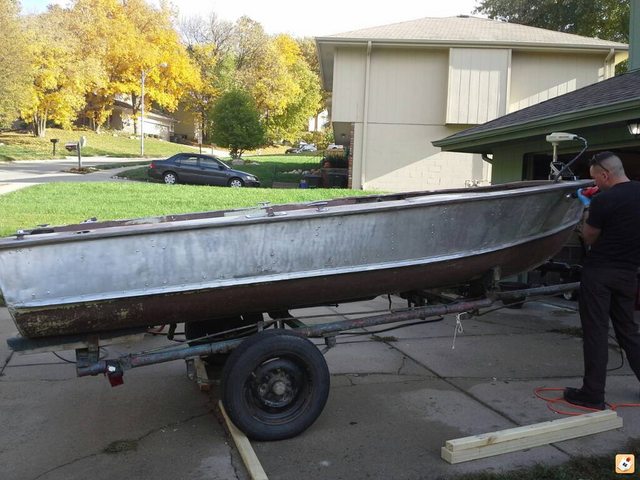
I just picked up a 1959 Duracraft V-Hull and started working on it the other day. I have a couple picture of the original boat and I'll make sure to post those tomorrow.

My goal is to clean up the outside and paint it in a color appropriate to this area. Perhaps in a camo-pattern for when I finally give into my buddies duck hunting requests :).

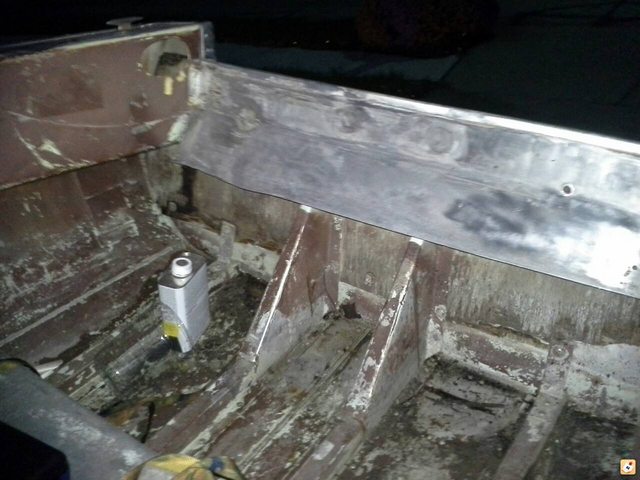
I want to prep the inside and flatten out the bottom floor, possibly with some foam on the bottom (for flotation and quietness) and add fiber treated wood. I'm also going to replace the transom with the same kind of wood as it is rotting out. Next, I want to frame up the inside to add storage, rod holders, fishing decks, etc. I might even add a center console, but I'm still debating whether or not I want that. Finally, after I have framed everything up, I'm considering adding a polyurethane coating to the inside instead of carpeting.

As of right now, these are my plans, but I'm sure I'll think of a lot more as I continue to get any feedback and as I search around the forums more.
00N0N_33f8vS9dBaO_600x450.jpg

00a0a_eysJs57gQgH_600x450.jpg

00M0M_ayCe37KoI3L_600x450.jpg


Throughout this post, I welcome all suggestions from everyone as I am completely new to this. Outside of a little rubber 8' Bass Raider, I've never owned a boat. I picked this project for two reasons: 1) To not get lazy during the winter 2) To have a boat!!

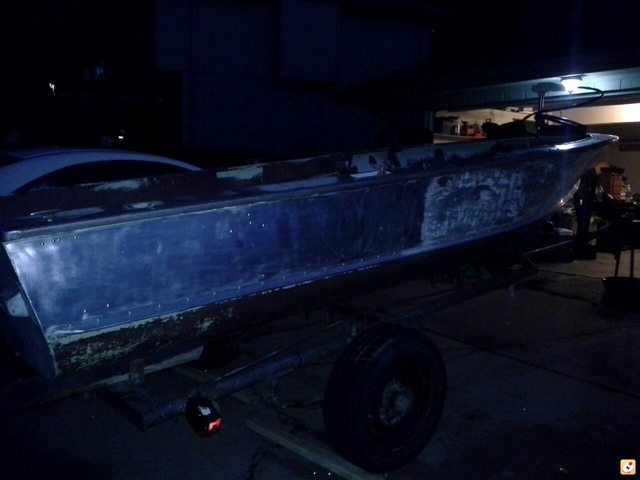
I want to keep a detailed listing throughout my project so people (like myself) that are new this understand the time and cost for the project One note, however, is that I'm stripping the boat completely down to aluminum and repainting as I just want to know how to! (plus there are 6~ layers of paint on the boat).

Outside of basic hand tools, I pretty much have to buy all of the power tools as I go. This guide, hopefully, will show the basic cost of getting dirty from the ground up.

Items Purchased So Far
Tools:
Rivet Tool (Plus Rivets - many variou sizes)
Cheap 3" Paint Brushes (Used for laying on stripper)
Wire Brush Attachments (for drill)
Wire Brushes (Hard to reach spots)
Random Orbit Sander (5") - $60.00
Heat Gun (700-1000 Degrees Farenheit) - $22.00

Supplies:
Acetone
Paint Stripper (5 Layer Stripper)
JB weld (for previous rivets)
Non-Abrassive Disposable Gloves
Face Mask
Scrap wood from menards ("pallet spacers" - 49 cents per, any size!)
2x Spray Aircraft Stripper - $16 ($8.00 per can - I wouldn't recommend purchasing this. Shell out the money for the gel form).
Large Can of Aircraft Stripper (Gel) - $45.00

"Future Purchase List":
Random Orbit Sander (80-180 grit sanding paper)
Buffer
Zinc Chromate Primer

Current Cost:
Boat: $450.00
Supplies(Including Tools): $210
Total: $757.00


Time Spent:
14 Hours

**Note: This is my first project and the boat is 54 years old, so I will be learning throughout the process. I'm in no hurry. Properly prepping aluminum to hold paint is very, very important (from what I've read).**
 
Through trial and error, I have finished up prepping the rear of the boat today. I started on the left side two and after 2 applications of stripper -- you can see how much is still left. From suggestions on these forums, I think I'm going to go pickup some Aircraft Stripper in the morning. I feel like I'm going to waste more money in stripper than anything right now!

((I took pictures on my phone and uploaded them to the Nebraska Fish and Game Association site via Tapatalk... I'll start taking them with my camera and uploading them.))
 
Welcome aboard, jdspringr07.
Nice project you got there and I'm looking forward to following your progress.
Be sure to update your location in your profile.

jasper
 
Welcome, jdspringr07, to the forum. Hope you enjoy it as much as I have. I have an old boat like that, it's a boat very similar to yours. It is a 14' Lonestar, camo paint and a 18 hp Johnnyrude. I would like to know what size outboard yours has. Looking forward to seeing what you do with your project. Glad to have you here. BrazosDon
 
[url=https://www.tinboats.net/forum/viewtopic.php?p=333476#p333476 said:
BrazosDon » 31 Oct 2013, 18:36[/url]"]Welcome, jdspringr07, to the forum. Hope you enjoy it as much as I have. I have an old boat like that, it's a boat very similar to yours. It is a 14' Lonestar, camo paint and a 18 hp Johnnyrude. I would like to know what size outboard yours has. Looking forward to seeing what you do with your project. Glad to have you here. BrazosDon

The boat came with a little 4 hp Evinrude. The boat at one point at a 115 HP (old motor) on it and the back has plenty of room for a huge transom with aluminum mounts as well.

I'm going to look around and pickup atleast a 25+ HP motor and preferably a 40+ HP if I can find a good enough deal on one.
 
xJ1Fl0zl.jpg

FlZlvIfl.jpg

Wow0yfpl.jpg

frq5EPCl.jpg


The pictures are in order:
1st - Mostly finished with the back of the boat. I need to grind off the original bolts to get the two handles off in the rear so I can finish cleaning it up and to replace the transom.
2nd - Left side of boat after typical aluminum safe stripper (5+ layer stripper). This is after 1 coat of stripper and a little bit of sanding.
3rd - The right side of the boat after 1 layer of Aircraft Stripper. I'm also about 50% complete with a litle wire brushing up the side to remove and residual paint and debree. I'm also fixing cleaning up little scratches along the way as well.
4th - A picture of my mounted transom. My assumption is that I need to just remove the two braces by removing the rivets and remove all of the bolts on the back end of the boat. I'll probably accomplish this later in the winter when it is garaged. I want to finish up removing all of the out paint, prepping for paint, then finish painting it before it is no longer feasible to work outside.

The more I work down to the aluminum around the boat, the more I want to NOT paint it :). I'm considering polishing the holy hell out of the hull and giving it a mirror look. I'm still debating on this. It would be a lot easier to cover up a lot of cosmetic issues if I just apply a paint over the bottom.
 
I've learned a couple of lessons today.

1 - Shell out the extra money and pick up Aircraft Stripper if you want to strip down to aluminum. It is roughly $20 more for a big container, but overall (especially on an older boat like mine) I think it will save in stripper cost. If I was to stick with my current stripper, I'd have to buy 2x-3x more stripped to accomplish the same thing. The 2nd picture I have that I used the stripper on was a trial with a simple aerosal version of the stripper. I'm going to be picking up the "good stuff" tomorrow (gel form). If the spray version can accomplish the same amount as the tyipcal 5 layer stripped that I purchased at the store, I can only image how much the original form would accomplish.

2- If you either own, can rent, or can borrow a power washer -- do it! I have saved myself a lot of time and effort by borrow a friends 2900~ PSI power washer. It is also helpful in removing old stickers from the boat as well!

3- Don't get your fingers near the power washer! [-X lol. Lacerations can happen very quickly this way. I tried cleaning a tool and got my thumb a little too close, now I've got a nice little split on my thumb!

Current notes: Stripping completly down to aluminum takes a huge investment in time! I have found that purchasing a little wire brush attachment for my drill has been a time saver. Just make sure to go over the hull lightly if you do so. If you intend on painting it after removing all of the old stuff, a wire brush allows you to push those little abrassions onto the hull for when you prime it. To save time, it would be useful to have primer ready (zinc chromate or molybdate) to coat the bottom. Aluminum will oxidize fairly quick, so if you let it sit - you will have to wipe it down and sand over it again for application. Priming it on the spot will save a lot of time on down the road. I am most likely going to start doing this from now on.
 
That's a great looking little boat man. The first time I glanced at that stern picture those handles jumped out at me and I thought "Tail lights?.. why??" LOL. Anyhow I like your idea of just painting the bottom up to the first runner then leaving the rest bright aluminum..Then maybe paint that top to gunwale to match the bottom hull. That would look really great.
 
One more tip with the aircraft stripper is to apply it and then cover it with plastic wrap. This gives it more time to work without drying out. Then you use the plastic wrap almost like a squeegee to remove the paint.

Also, how long is the boat, it looks to be in the 12-14' range.

If so, then you will probably be very happy with a 25hp. The step from 25-40 adds a lot of weight. There are a few 28, 30, and 35's that are basically a 25 with a different intake and carb. So you get more power without increasing the weight. But a 40hp steps up to a larger motor in every dimension.

I absolutely love the polished aluminum boats. But it only took me about a 1x4' area of polishing to realize that I wasn't going to keep a fishing boat polished all the time. So I stripped all of the paint, etched the boat with alumaprep, then scrubbed it twice with baking soda and the green scrub pads to neutralize the alumaprep. I was careful to scrub all in straight lines and the end result looks like brushed aluminum. But is etched and protected from corrosion. When I need to get a stubborn stain off or touch up a spot, I use the 3m red prep pads and it quickly blends back with the rest of the finish.
See my boat here.
https://www.tinboats.net/forum/viewtopic.php?f=21&t=30396

Btw, Cool old boat!!
 
[url=https://www.tinboats.net/forum/viewtopic.php?p=333496#p333496 said:
CLM » 31 Oct 2013, 19:50[/url]"]One more tip with the aircraft stripper is to apply it and then cover it with plastic wrap. This gives it more time to work without drying out. Then you use the plastic wrap almost like a squeegee to remove the paint.

Also, how long is the boat, it looks to be in the 12-14' range.

If so, then you will probably be very happy with a 25hp. The step from 25-40 adds a lot of weight. There are a few 28, 30, and 35's that are basically a 25 with a different intake and carb. So you get more power without increasing the weight. But a 40hp steps up to a larger motor in every dimension.

I absolutely love the polished aluminum boats. But it only took me about a 1x4' area of polishing to realize that I wasn't going to keep a fishing boat polished all the time. So I stripped all of the paint, etched the boat with alumaprep, then scrubbed it twice with baking soda and the green scrub pads to neutralize the alumaprep. I was careful to scrub all in straight lines and the end result looks like brushed aluminum. But is etched and protected from corrosion. When I need to get a stubborn stain off or touch up a spot, I use the 3m red prep pads and it quickly blends back with the rest of the finish.
See my boat here.
https://www.tinboats.net/forum/viewtopic.php?f=21&t=30396

Btw, Cool old boat!!

I was only considering the higher horse motor because I'm considering taking it on the Missouri for some River fishin'.

I'll have to give the plastic wrap a try tomorrow when I got pickup supplies. Hopefully I can get the entire bottom of the boat stripped by the end of weekend. I want to get the outside of the hull finished up before winter hits so I don't have to freeze my butt off!

I've seen your boat a couple of times and it looks really awesome! Good job on the restoral :). I might give your method for the aluminum a shot, because I know that keeping aluminum polished can be more of a task than it's worth. Thanks for the suggestion!
 
[url=https://www.tinboats.net/forum/viewtopic.php?p=333492#p333492 said:
Mojo » 31 Oct 2013, 19:37[/url]"]That's a great looking little boat man. The first time I glanced at that stern picture those handles jumped out at me and I thought "Tail lights?.. why??" LOL. Anyhow I like your idea of just painting the bottom up to the first runner then leaving the rest bright aluminum..Then maybe paint that top to gunwale to match the bottom hull. That would look really great.

I'm not entirely certain yet. With my wire brushing I have been able to get out a lot of the little scratches, but some of the dings on the side is very apparent with an aluminum finish. I've got to figure a way to get the dents out without damaging the hull :).
 
[url=https://www.tinboats.net/forum/viewtopic.php?p=333494#p333494 said:
nctlspider » 31 Oct 2013, 19:45[/url]"]Looking good! Have you determined which model boat it was?

There's no record of the exact model and I don't have much information with the planets on the boat, but my closest guess (with the weight/passenger capacity tag) is a 1959 Durcraft Sportsman Deluxe.

Question for someone -- is the maximum horsepower limit due to the transom in place or is it based on the hull's strength?

I think I answered my question here: https://www.tinboats.net/forum/viewtopic.php?f=4&t=12144. Just to clarify, however, the maximum HP is based off of hull length and transom size?

Purely based off measurements: (14 * 4.54 * 2) - 15 (for hand extension control) = 115 HP.. If I were to do a steering boat, then I would put a maximum motor of 40 HP.

I need to look up why hand steering vs steering wheel is such a large difference. My assumption is that it is because of all the extra weight with the steering wheel motor?
 
[url=https://www.tinboats.net/forum/viewtopic.php?p=333506#p333506 said:
DuraCraft » 31 Oct 2013, 21:07[/url]"]jd, my friend, I like ye boat! You can tell by my name here! Tough aluminum boat! Keep up the good work! You didn't used to live near Mountain View CA did ye?

Sure didn't :).
 
I stripped the entire outside of my hull in about 3 hours time using aircraft stripper, plastic wrap, plastic scrappers, plastic scrub brush and pressure washer. Once I slid off as much of the paint as possible with the plastic wrap, then I used the scrappers and brush to hit the stubborn spots, followed by pressure washer. Second coat in some places.

Check your formula again.
Remote Max HP = ( 14 x 4.54 x 2 ) - 90 = 37.12 if you have at least a 20" transom.

Tiller Max HP = ( 14 x 4.54 x .8 ) - 25 = 25.848 for rounded hulls

Tiller Max HP = (14 x 4.54 x .5 ) - 15 = 16.78 if you figure for hard chined boats
 
I think the stripper isn't working quite as well because it is getting colder outside. I need to find a warmer place to apply it =/. I'm still receiving a lot of excess paint because of the colder weather. Even with the aircraft stripper.
 
I just purchased a heatgun (700 farenheit - 1000 farenheit). After letting the stripper sit on for about 5 minutes, I quickly go back and forth over the surface on the highest setting. It "cooks" up the stripper a little better in colder weather conditions. I scrape off the first layer, then appry a light coat of stripper on the remaining surface. It appears to pull up the paint pretty well this way.

I'm going to wait until tomorrow when I can do the second coat with a pressure washer. I'm also going to setup a plastic debree catcher around the boat as well so paint and stripper doesn't fly everywhere.

Also, I'm looking at going the for one of the following color schemes: 1) Woodland Camo 2) "America" - Red (below water line), white (above water line), Blue (interior - still considering a blue polyurthean coating (i.e. rhino line, linex, etc)).
 
[url=https://www.tinboats.net/forum/viewtopic.php?p=333483#p333483 said:
jdspringr07 » October 31st, 2013, 7:14 pm[/url]"]
xJ1Fl0zl.jpg

jd,
I'm enjoying your thread. Great progress.
Just curious, are those tail lights?

jasper
 
Top