Zum said:
Heres a few pictures.
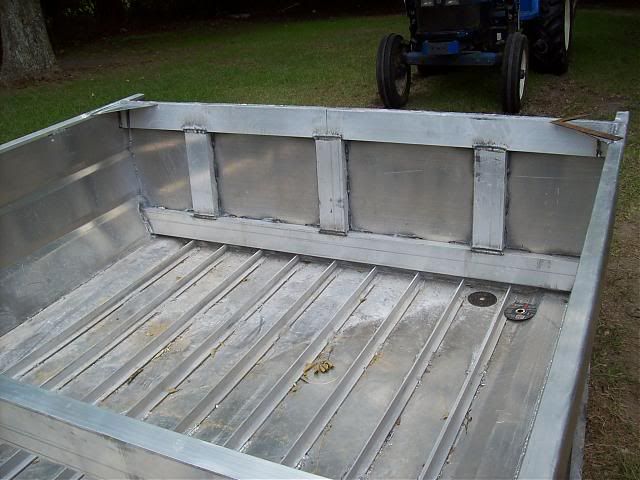
My boats has a 100 gauge skin,the bracing and tubing looks close to 1/4".
The seats are part of the structure as there is bracing welded to it.
The 2 middle braces go right to the floor,where my tunnel hull is.
The 2 stainless bolts you might see is where I had another outboard mounted.
The tubing seems to be around 11/4" by 3",sorry didn't bring a ruler to get better measurements for you.
Maybe someone without a false floor can post you a picture to see how they are welded to the ribs/floor.
Zum,
I want to make sure I'm understanding you here. Please confirm if the statements I make about welding are correct.
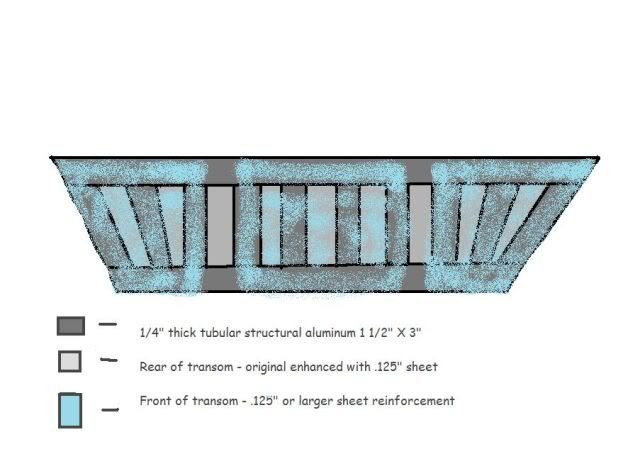
You're saying your boat's overall aluminum sheathing is .100" and the tubing used for bracing the transom is one quarter inch thick.
There are two large, very thick aluminum braces that go straight to the floor and from what I can see, are welded at all attachment points.
The tubing dimensions are 11" long, 4" wide and 3" deep and are also welded in place.
The two stainless bolts are filling holes where another outboard was mounted.
Let me know if that's got it.
Thank you for posting this. It's very useful information. Was the big bracing always there? As in part of the original setup?

")
.JPG")
.JPG")
.JPG")


 - Copy.JPG")