86BassTrackerV17 1st fishing trip w/son 10/11/13 vids p15

TinBoats.net

Help Support TinBoats.net:

This site may earn a commission from merchant affiliate links, including eBay, Amazon, and others.
tccanoe said:
Dave, Sorry to keep chiming in but I just got to talk to ya. I'm a 22yr RN by profession if you know what I mean. Anyway. After getting all the decals off, I can really see the lines of the hull and that is an outstanding looking boat. I guess the decals are like a bill-board and just draw my eyes to them, blurring the overall boat. That hull is one of those that looks fast sitting still.

Tccanoe,

Keep right on chiming in, that's what keeps me motivated and my spirits up. If you're an RN, you'll know how I feel (I'm an RRT) about going to a doc in the box or a dentist for medical care.

This past week, I had to go to both. Had a crown get infected and what the dr. wrote for (Augmentin) wasn't touching the bacteria. Got real sick over the course of four days, with huge facial swelling on the left side nearly closing my eye, fever/chills out the roof and pain bad enough Lortab wasn't touching it (and I'm a square, don't do drugs or drink) - got so bad I took a drink with my Lortab and still didn't help the last night before the dentist/oral surgeon (No sleep that night.).

Ended up with the good ole oral surgeon lancing the swelling over the tooth with a scalpel to drain it, but he didn't put in a drain, so drainage was slow over this past weekend. I'm reasonably sure I was about a half step from becoming septic (Won't say why, but you know the signs, I was starting to see some of the basic ones.)

Post like yours and other guys helped me keep my mind off the misery of that episode while it was going on. I'm on the mend now and starting to taste the new antibiotic (metallic taste) in my mouth and feeling more like myself.

Thank you for your posts. Really helped me out when I was miserable.

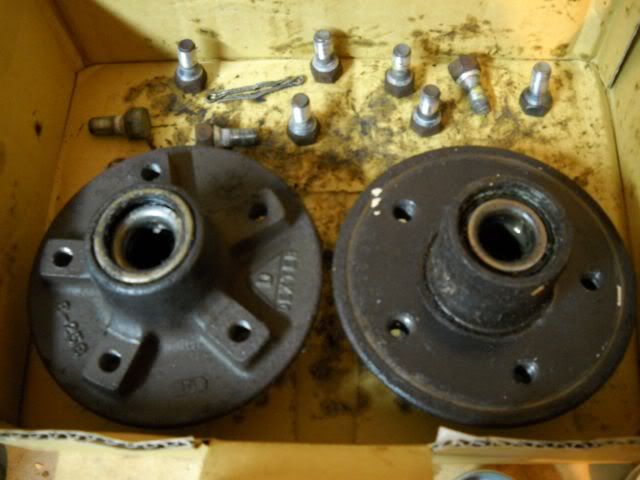
On the boat: I agree with you about the lines. I think it's a nice combination of a V-Hull and a bass boat. An old pro that lives out on Lake Lanier, known as Lanier Jim on Georgia Outdoor Network forums told me he thought it may be an ideal fishing boat for fishing on Lake Lanier for spotted bass and the occasional striper. I have high hopes for the boat as I move along in the remodeling process.
 
Dave, I was thinking ( a dangerous place to be). About the bunks, they make a recycled deck material that is like plastic press board that comes in a dark tan. I think I remember some of the railing material in a 2X4 configuration. Like the hand rail or something? That stuff would be like Teflon for the boat to slid on and off of and never rot. Just a thought. Did I see it a Lowe's? They use it out in Origin where wood rots in 6 to 7 weeks.
 
Great work Dave.

There is a company in Winder (I think) called Ultimate Bunk Boards which may be what you are looking for. It's like cutting board material. Super slick from what I've heard, and last forever. I don't remember without going through your build if the bottom of the hull is riveted or not. If it is, I'd stick with carpet. If not, you may see what they can do for you.

Keep up the great work. You'll have a masterpiece in no time. Slow, calculated and methodical. =D>
 
Hi Dave,

I don't have any first hand experience, but I've seem some of the manufacturers of the bunk glides state "not intended for riveted hulls". I think you'd be safe with something that was continuous the length of the boat (as ultimate bunks are I'm pretty sure), but I can't say for sure. Best to discuss with the mfg. The products I've seen the caution on were the ones where you space the glides on as 3 or 4 seperate strips with gaps between each. I can see how ramming the rivets against the edge of these things could do some damage over time. I believe this was brought up during Baptistpreach's mod which can be found in the mod section. I haven't seen him here lately, and I'm not sure if he's still around to ask how the boat is doing after a year.

Russ put a set of Ultimate Bunks on his first build if you want to ask him anything specific about their product.

While I'm thinking of it, want to make sure you know that your bare aluminum (now exposed) has begun to form it's own protective coating of oxidation that will need to be lightly scuffed before applying your primer if you plan to paint. I'd do it the same day you plan to prime.
 
I put the Ultamate Guide bunks on my trailer and they are OK. I think they run a little short when you order. No problem with rivits at all. They are made of a recycled plastic press-board like meterial with a tiney shark skin like strip on the up side for grip (for looks I think). Like I said before. If we could find a bulk meterial made the same way, I'm sure it would be cheaper, just as effective and long lasting and we could cut to size without busting the bank. Every foot you go up in size with the Ulta Guide the price BAMS!
 
https://www.ultimatebunkboards.com/gpage4.html
Although the price seems alittle high,I'd take a serious look at them.
For shallow water launching/loading they'd be great.
Shipping is what holds me back from getting them.

I went to a butcher(big store)and they use cutting boards that are 4' long,1/2" thick.
I plan on ripping that to put on my bunks but I'll still have wood to deal with.
 
Zum, could you rust proof steel 2x4's then top them with the butcher board? Seems the steel bunks would not rust any faster than any other steel part of the trailer. You think?
 
Dave, Cofer/Adams in Lawrenceville, Ga. has an engineered wood dept. 770-995-3907. Might be worth checking out. I don't know how close Lawrenceville is to you but it looks like a big place with lots of building products.
 
Brine,

Some comments in red in the quote.

Brine said:
I don't have any first hand experience, but I've seem some of the manufacturers of the bunk glides state "not intended for riveted hulls". I think you'd be safe with something that was continuous the length of the boat (as ultimate bunks are I'm pretty sure), but I can't say for sure. Best to discuss with the mfg.

I spoke with Joe (I think the owner.) of Ultimate Bunkboards this morning before I had to leave to go to a training class. He stated uses his bunks on his own riveted jon boat and is comfortable saying his boards are safe to use with riveted boats. He said the plastic is soft enough a rivet hitting the bunk would leave a divot in the plastic board, but he doesn't see how it would hard the rivet.

Of interest to those living in Georgia is his warehouse is on Hwy 129 headed toward Gainesville just off I-85. For me, it's about a 10-15 minute drive tops. So I could pick the boards up with no shipping costs associated. Others within a reasonable drive of that exit could likely do the same.


The products I've seen the caution on were the ones where you space the glides on as 3 or 4 seperate strips with gaps between each. I can see how ramming the rivets against the edge of these things could do some damage over time. I believe this was brought up during Baptistpreach's mod which can be found in the mod section. I haven't seen him here lately, and I'm not sure if he's still around to ask how the boat is doing after a year.

I can see how having the separate strips with gaps would cause such a thing and totally agree with you on this. With solid bunks, I'm thinking the major risk would be when you're bringing the boat on and off the bunks and a rivet would hit the end of the board. But that would be similar risk to a 2 X 4. I'm guessing you could cut the end of the board to an angle to minimize this risk. What do you think?

Russ put a set of Ultimate Bunks on his first build if you want to ask him anything specific about their product.

I'd love to. Do you know his full nick name? I've seen it, but I'm having oldmanitis and can't think of it.

While I'm thinking of it, want to make sure you know that your bare aluminum (now exposed) has begun to form it's own protective coating of oxidation that will need to be lightly scuffed before applying your primer if you plan to paint. I'd do it the same day you plan to prime.

Thank you for reminding me of that. I'd let it slip my mind and I'm definitely wanting to get as much painting done on the boat before the winter starts cooling things down to much, so time is of the essence now. Do you have any recommendations for what to scuff the aluminum with? Green scrubbie pad?
 
tccanoe said:
Dave, Cofer/Adams in Lawrenceville, Ga. has an engineered wood dept. 770-995-3907. Might be worth checking out. I don't know how close Lawrenceville is to you but it looks like a big place with lots of building products.

Thanks for the information. Lawrenceville is where I used to live and it's a reasonable drive from here and where my best buddy lives. I'll give these guys a call.

Btw, I got your pm with the quotes, but couldn't find where you'd typed anything new in. I'll look again, maybe I was just tired at the time. :shock:
 
What I tried to say about your tooth was: Man, what a horror story. It sounds like the infection was one step ahead of the people treating it. It's hard to stay in the patient role when the medical professional in you gives you the gut feeling that someone is goofing up. Glad you're mending and back at the boat. I've spent many a long night with an RT at a sick sick patient's bedside trying to keep them alive and I've also spent many a long night with a group of coworkers sitting around telling tall tails and cracking wise. All good. I too am square. No drink, no drug, no smoke. If you don't smoke then you're the only RT in the SEC that don't!
 
Dave,

Yes I know Joe. I fished in an all electric club (HVBA High Voltage Bass Anglers) with him for 3 years. I tried talking (emailing) him into being a sponsor here a year or so ago. Never heard back. Seems like we would be a perfect audience.

I haven't heard anything negative about the Ultimate Bunks and riveted hulls, just as you imgined....on the individual strips that are spaced out.

I don't see the value in the angled bunks. The difference with the strips vs a 2x4 is that portion of the bunk should/would be below the waterline and not make contact with the hull while loading or unloading. I guess we're on the same page in that if you decide on the plastic route, get the Ultimate Bunks or a similar one piece job vs the strips.

Russ010 ~ He can be found under the Bass Clubs section next to "BANG"

I'd go with a cup brush on the drill or angle grinder just because I hate sanding :LOL2: You should only have to hit the surface very lightly at the stage you're in. Wipe down with acetone, tack cloth, and prime away.
 
Dave is your hull leaking at all? MIne has some decent leaks and I haev rebucked the rivets and that helped a little, but without reinstalling a ton of rivets do you think gluv it would work? I have a tracker v-14 so a very similar hull but i have a tiller instead of a console. Thoughts?

Thanks,

Jason

https://www.tinboats.net/forum/viewtopic.php?f=21&t=14066
 
Troutman3000 said:
Dave is your hull leaking at all? MIne has some decent leaks and I haev rebucked the rivets and that helped a little, but without reinstalling a ton of rivets do you think gluv it would work? I have a tracker v-14 so a very similar hull but i have a tiller instead of a console. Thoughts?

Thanks,

Jason

https://www.tinboats.net/forum/viewtopic.php?f=21&t=14066

Jason,

I haven't seen any leaks from inside the hull. I did see the chines (right word?) on the outside of the hull leak when I pulled the boat off of the trailer, but I think they have some wrinkles where water can get inside them instead of actual leaks from the inside of the boat/hull. Haven't decided what I'll do about these yet. Probably rebuck rivets and try to straight out the wrinkles as I do that.

I am reasonably sure I'm safe, but I've had a lot of water inside when I stripped the paint inside.

If it were my tin, I'd water up the hull, mark the leaking rivets, rebuck them and if that did not work, I'd replace the rivets. But then, I've got a good case of OCD from working in the medical field.

Dave
 
DaveInGA said:
Troutman3000 said:
Dave is your hull leaking at all? MIne has some decent leaks and I haev rebucked the rivets and that helped a little, but without reinstalling a ton of rivets do you think gluv it would work? I have a tracker v-14 so a very similar hull but i have a tiller instead of a console. Thoughts?

Thanks,

Jason

https://www.tinboats.net/forum/viewtopic.php?f=21&t=14066

Jason,

I haven't seen any leaks from inside the hull. I did see the chines (right word?) on the outside of the hull leak when I pulled the boat off of the trailer, but I think they have some wrinkles where water can get inside them instead of actual leaks from the inside of the boat/hull. Haven't decided what I'll do about these yet. Probably rebuck rivets and try to straight out the wrinkles as I do that.

I am reasonably sure I'm safe, but I've had a lot of water inside when I stripped the paint inside.

If it were my tin, I'd water up the hull, mark the leaking rivets, rebuck them and if that did not work, I'd replace the rivets. But then, I've got a good case of OCD from working in the medical field.

Dave


I thought that you would say that. How hard is it to replace the rivets? Can I use a hand tool or should I get something from Harbor Frieght? I am kind of intimidated to install new rivets because if you mess up it could be bad news.
 
Troutman3000 said:
I thought that you would say that. How hard is it to replace the rivets? Can I use a hand tool or should I get something from Harbor Frieght? I am kind of intimidated to install new rivets because if you mess up it could be bad news.

Yeah, doing things the right way is always a pain in the rear, but in the long run, you'll have a more durable repair and you'll be more satisfied with the results.

This is based partly on experience, partly on research, but here is what I think I know about replacing rivets:

Replacing the rivets, what you have to deal with:

1. Removing the rivets - couple ways to do it, but I simply ground off the inside tip of the rivet, then carefully tapped the rivet through the hole. If you want to make it easier, drill a hole through the center of the rivet to allow more give, just like with a pop rivet. The reason I did this was to get a rivet head I can use to order replacement rivets.

Link to order rivets given to me by bassboy1:

https://www.grainger.com/Grainger/solid-rivets/rivets/fasteners/ecatalog/N-8mk

2. Reinstalling the rivets: -

I. If you only have a couple rivets to do, then a ball peen hammer, a bucking bar and a rivet set are all you need. The rivet set fits in a pneumatic rivet gun, but you can use it with a hammer. You'll need a man on the inside to hold the bucking bar and a man on the outside to strike the rivet set against the rivet head.

a. Place rivet through hole, hold in place with rivet set.

b. Place bucking bar against rivet on the inside.

c. Strike rivet set with hammer while partner inside boat keeps an eye on how the rivet is setting. He'll tell you when the rivet has mushroomed to an appropriate amount.

II. If you have a bunch of rivets to do/replace, then consider getting a pneumatic rivet hammer. Using the rivet hammer is basically the same process, except you use the rivet hammer in place of the ball peen hammer. A lot less work and less likelihood of missing with the ball peen hammer.

Some rivet links:

Tools

https://www.aircraftspruce.com/catalog/topages/topcanrivetsets.php

Closed in pop rivets for applications not involving the hull, such as decking, etc.

https://www.hansonrivet.com/w22.htm

How to:

https://www.tinboats.net/forum/viewtopic.php?f=3&t=13114&hilit=bucking+rivets

https://www.youtube.com/watch?v=gr24Nvs7fd0&feature=related

Hope this helps,

Dave
 
Thanks Dave - Im gonna fill up this beast with water and see what happens this winter. I cant stay off the water long enough to get anything done!
 
Been a few days since last progress, been busy at work. I've stripped down my trailer and needed to get new hubs going so I can take it over to a buddy's house, who is going to do some welding stuff for me.

Here's the hub changing process:

DSCN1143.jpg


The original Dexter hubs - I didn't like the through bolts these hubs had and wanted to replace them with a more standard stud and nut arrangement. Nothing wrong with these hubs, but between the clean up and the odd bolts, I felt $30.00 each for a pair of new hubs with new bearings, etc. in a configuration I liked better was worth it. Note the cast in number. This helped me when I went to Airport Trailers in Gainesville, GA. Airport Trailers is a top notch outfit with very competitive pricing and excellent customer service. They were able to get me out of there with two new hubs, all new bearings, marine grass and a can of CRC spray to clean out the old grease for $76.00.

DSCN1095.jpg


Packing the new bearings. Here is a pic of me removing a bearing to show it after I'd already put it in the setup. My wife missed the pic and wanted me to remove it so she could take a pic of the assembly. The gadget I'm using came from Advance Auto Parts and it cost $6.49. Greatly sped up the bearing/grease packing process.

DSCN1098.jpg


Assembling the bearing packer.

DSCN1099.jpg


Attaching the bearing packer to a grease gun.

DSCN1100.jpg


Packing the bearing.
 
This is a continuation of the previous post on hub replacement:

DSCN1074.jpg


The packed bearing.

DSCN1103.jpg


Installing the grease seal. The grease seal on this particular Dexter axle/hub combination has a large opening. Check out the following pics to see why.

DSCN1079.jpg


Note the worn portion on the dark part of the axle. This is where the grease seal must ride for this axle. Dexter made two sizes of grease seal for the hub I have and the larger size is required by this axle.

DSCN1081.jpg


Here is the correct grease seal. Note the wide opening.

DSCN1083.jpg


A close up view where you can see the wide opening. This seal, combined with a standard set of bearings allows a modern hub to work with these bearings. The only way I found this out was to find a retailer (Airport Trailers) who use a lot of Dexter products and was familiar as well as having parts in stock. Made life much easier. Small businesses are your friend.

DSCN1107.jpg


Final seating of the grease seal using a brass punch. Any further seating will be done when I tighten the castle nut during hub installation.
 

Latest posts

Top