Mirrorcraft 14 Deep Fisherman

TinBoats.net

Help Support TinBoats.net:

This site may earn a commission from merchant affiliate links, including eBay, Amazon, and others.
Niced job on the transom. All I can say about the girlfriend is that if she thinks your spending alot of time on the boat now, wait until she sees how much time you spend on it when its done!! :mrgreen: :mrgreen:
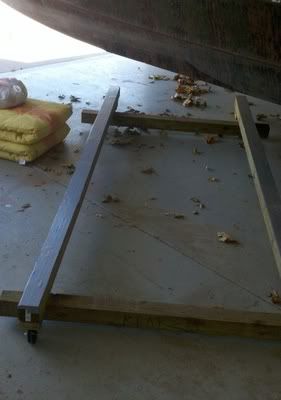
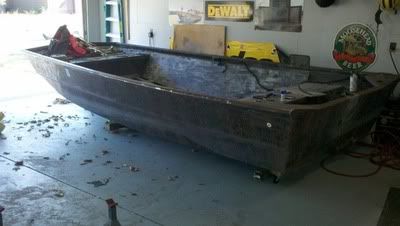
 
bigwave said:
I would like to know if there is an easy way move it in and out of the garage....roller stands? Anyone have a good way to move around by my self? I will post some more pics up this weekend.

I created a dolly with casters for my build...

4.jpg

5.jpg
 
I know this is a bit ahead of what I should be doing right now, but I mocked up an idea for the center spine. I will probably be following Fish4fools layout....this is the only piece of 3/4 I will have in the boat. I believe it will give me a nice sturdy spine, as well as a good spot to elevate my chase tubes and tie my floor joist into. All this stuff down here will be coated with resin and sealed again with gel-coat.....then I will use the expanding foam to lock it all in place and keep my tin from sinking...... :lol:
 

Attachments

  • center spine.JPG
    center spine.JPG
    731.6 KB · Views: 1,778
  • New Image.JPG
    New Image.JPG
    737 KB · Views: 1,778
bigwave said:
2-1.jpg

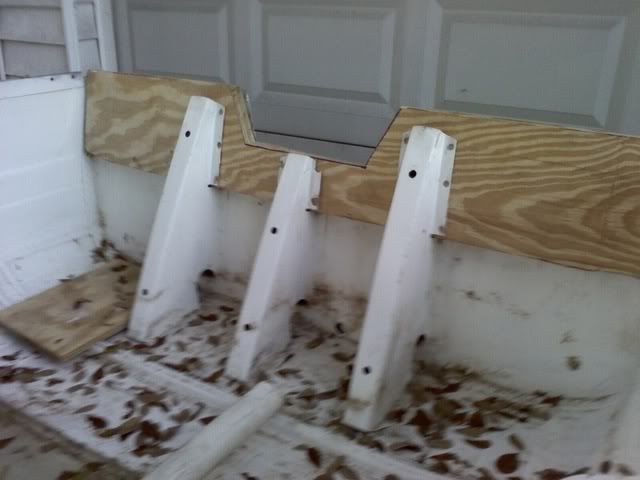
Now the motor will be at the proper depth for propulsion.......I plan on sealing with glass and then a coat or two of gel-coat.....the mason wheel worked great for the cut on the aluminum. Thanks for the tip fish4fool. By the way, anyone know how to get the girlfriend to understand just how important this boat project is.......She just does not understand why I am spending so much time on the boat. :mrgreen:

Bigwave, with that knee brace right there, I'm not sure my outboard would clamp on. Did you check and see if yours fits?
 
Ictalrus, good eye....as you can see the bolt holes are almost gone...the bracket will fit between the brace. I will probably have to shave the top just a bit 1/2" or so. I plan on having a diamond plate on this side...and the outside too....I will probably abandon the screw down clamps and bolt the motor right through the transom....like you would if it was not a tiller motor. This will also deter theft long enough for me to sick my dog and or 357 on some idiot trying to steal my motor.
 
Hey Fish4fool, I plan on putting two pipes, one on each side of the stringer using cushioned hose clamps to elevate the pipes just above the floor joist. I want to run wires through one. and the other one for fuel lines. I don't think you can have enough ways to run stuff back and forth. All the framing will be resin- gel coated then locked in with the expanding foam. The old casting deck lasted 34 years before it finally rotted away, and it only had a light coat of resin.
 
Well not much accomplished this weekend, the weather was way to wet to spray again :cry: I did punch out a couple more things though.
 

Attachments

  • motorfit.JPG
    motorfit.JPG
    836 KB · Views: 2,255
  • Rear motorfit.JPG
    Rear motorfit.JPG
    1.1 MB · Views: 2,255
  • glass transom.JPG
    glass transom.JPG
    891.5 KB · Views: 2,255
  • mounting hardware.JPG
    mounting hardware.JPG
    1.1 MB · Views: 2,255
Still too wet to spray the boat with primer. I had to re-do my transom board. The glue that I used on the first one did not bond. I think it was a bad batch, I used liquid nails for wood, in the past this has worked very well for me.....not this time [-X So going back to my furniture refinishing days I remembered this product, which I know works..... hindsight.

I have also been buying odds and ends here and there....got the bedliner, center support, which I have decided to go with aluminum pool enclosure braces and castle clips that will be screwed into the ribs. I have plenty of L-brackets and about 10' of old aluminum window frames. If I can get some drier weather I will also be starting my livewell project....going to make my own.

Oh yea I almost forgot. I got all the seams on the hull gooed with 5200 and a few more hours of sanding done....seems like that is never ending :(
 

Attachments

  • glue.JPG
    glue.JPG
    557.6 KB · Views: 2,231
  • New Image.JPG
    New Image.JPG
    622.3 KB · Views: 2,231
The titebond III glue worked just like I thought it would. I was out of town this weekend but I did manage to cut the new transom board and sanded it down with 100girt. I will glass tonight and should be ready gel-coat later this week. The weather looks to be much better this week, so I should be able to get the primer coat on the hull.....thank god....I am tired of sanding and filling holes.... [-o< The hull prep has been the hardest part of my mod so far, patience is killing me but I feel confident the end result will be worth it.

P.S. The first transom board that did not bond will now be used as a motor stand/template for any future transom replacement.....I put about 4 hours of work into this mistake...at least I can salvage it for the stand. I can't see throwing it away.
 
Small update the glue worked awesome. I will now gel-coat this tonight.
 

Attachments

  • glued.jpg
    glued.jpg
    12.3 KB · Views: 2,164
  • transom coated.jpg
    transom coated.jpg
    21.8 KB · Views: 2,164
Take a look at my transom. It is not finsihed because of corners on top need to be upgraded but it may help. It is under Gerards overpowered jon boat
 
Retyping because I did not see last message post. Check out Gerards overpowered jon boat. You do not have to go to this extreme but it should give you an idea or two
 
Gerard, I am planning on putting a skin inside and outside just as you did. My original plan was to use diamond plate 1/4", But I found an alternative to that....I am either going to use my old seat aluminum for the skin, or 16" aluminum kick plate that is used on pool enclosures. Its only 33 bucks at home depot for a 16'x16" piece...and its already powder-coated. It will do what I need for the finish look on the outside of the hull. The transom itself is already solid as a rock. Your mod is looking good so far...probably going to set some speed records with that set up. :shock:
 
[/attachment]Mirrorcraft restore 017.jpgWell I finished the transom..I utilized my bench seat for the skin, inside and out. The board has one coat of resin, two coats gel-coat. Here are shots from start to finish. Just a little more sanding and primer time.....wooo hoooo :LOL2:
 

Attachments

  • transom2.JPG
    transom2.JPG
    636.2 KB · Views: 2,140
  • Gelcoat2.JPG
    Gelcoat2.JPG
    737.3 KB · Views: 2,139
  • Recycle Seat.JPG
    Recycle Seat.JPG
    1 MB · Views: 2,139
  • transomskin.JPG
    transomskin.JPG
    969.8 KB · Views: 2,139
  • bolting on transom inside.JPG
    bolting on transom inside.JPG
    884 KB · Views: 2,139
  • transombolt2.JPG
    transombolt2.JPG
    933.9 KB · Views: 2,139
After looking at your hull I see what you mean, your right mine does not have that, must be because its a different model? same paint jobs almost as mine, so I'm guessing it may have been made at the Northport plant? thats located about 30 minutes away from me in the small town of Gillett, Wisconsin. not really helpful info but its kinda cool knowing that these boats are made in the area
 
After looking at your hull I see what you mean, your right mine does not have that, must be because its a different model? same paint jobs almost as mine, so I'm guessing it may have been made at the Northport plant? thats located about 30 minutes away from me in the small town of Gillett, Wisconsin. not really helpful info but its kinda cool knowing that these boats are made in the area

If you call Mirrorcraft they can tell you what make and model you have. I still have the hull id tag...mine was made in 1984. They were very helpful.
 
Top