
Rick James
Well-known member
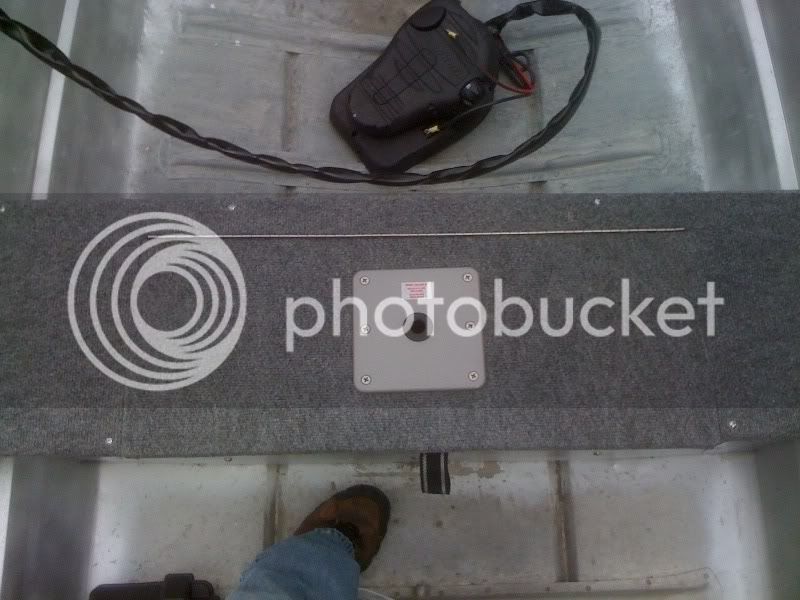
The top half was done with spray paint, the bottom half is actually Steelflex and was applied with a roller.
I'll likely spray paint the motor.
I'll likely spray paint the motor.
Rick James said:Just an update.........
I'm going to be starting up again on this in the next couple of weeks. My goal is to have this 99.99% done before the end of March. I have 3 fishing trips booked with the wife up in the Adirondacks through spring and summer, so I'd like to get this done within a week or two of ice out in March.
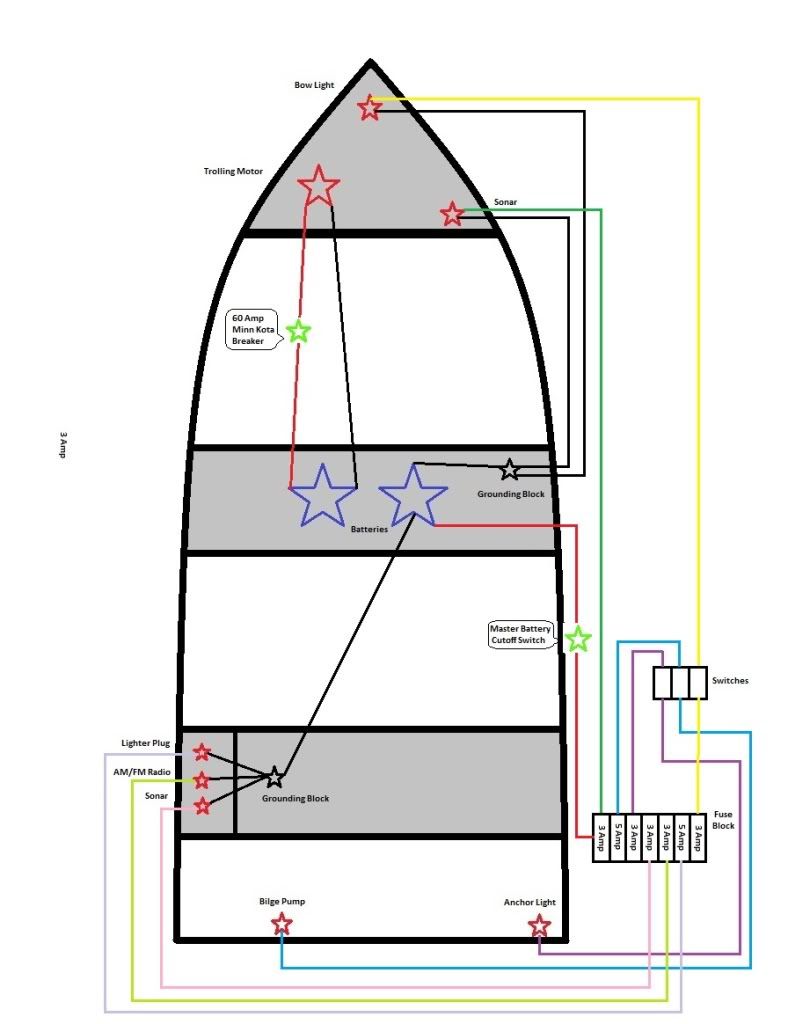
Below is my wiring diagram. I'll be throwing an extra 40amp fuse just in front of the battery that isn't included in this diagram, as well as a 2 bank onboard charger.
Hi Rick!
I'm new to the site and am working on a project similar to yours. I am rather impressed by the work so far and I'll probally capitalize on a few of your ideas.
If I could ask question based soley on your wiring schematic. Where are you placing the fuses for the trolling motor and other accessories? Are they on the battery or a distance away from the battery?
Merlin said:Hi Rick!
I'm new to the site and am working on a project similar to yours. I am rather impressed by the work so far and I'll probally capitalize on a few of your ideas.
If I could ask question based soley on your wiring schematic. Where are you placing the fuses for the trolling motor and other accessories? Are they on the battery or a distance away from the battery?
steelyhead17 said:Just a rookie questions but doesnt your trolling motor need to be level?
mattmean said:Same here, I have nearly an identical boat. I like your front casting deck made for the bow mount motor. how did u set that up?
Enter your email address to join: