xPress 1652HiD to Bass Boat Conversion - ALMOST DONE

TinBoats.net

Help Support TinBoats.net:

This site may earn a commission from merchant affiliate links, including eBay, Amazon, and others.

Starkfishes

Member
Joined
May 28, 2017
Messages
20
Reaction score
0
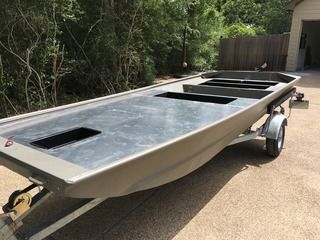
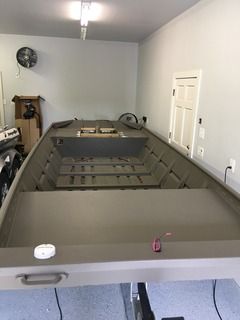
So I've been watching is forum for quite a while and you guys have done some pretty cool projects. This weekend, I started my xPress 1652 HiD conversion. I have access to several lakes that do not allow outboards and am going to convert this rig into a bass fishing platform to rival my Ranger Z521. When complete, the boat will have a 112 Ultrex and a Lowrance HDS12.

I forgot to take a completely before picture, but here we go:
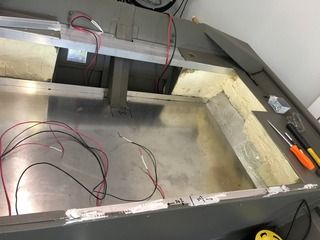
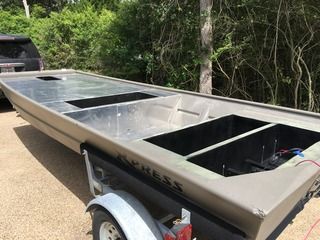
Wiring:
All of the wiring is in which includes front & rear running lights (I don't need the lights but if I ever sold the boat they would be a pain to install later), the wiring for the Lowrance, Ultrex, and the on-board charger.
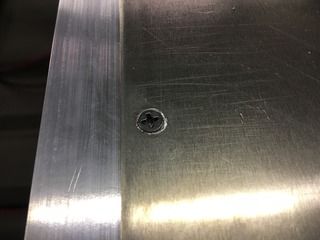
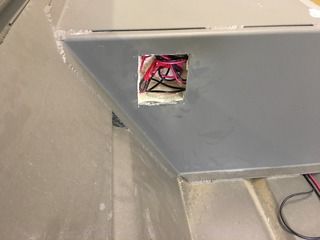
xPress1.jpg


Switch Panel:
The switch panel will be installed here and comes complete with push-to-reset fuses.
xPress4.jpg


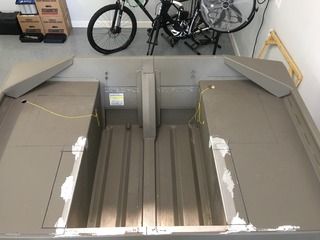
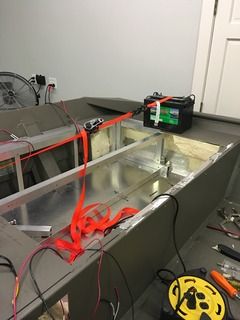
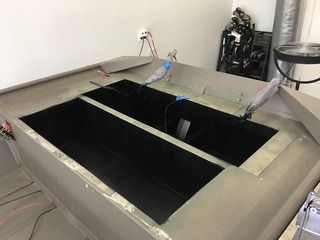
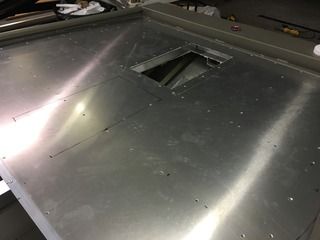
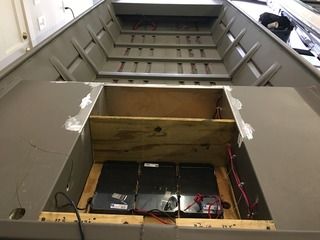
Rear Battery Compartment:
I removed the front cover of the battery / gas compartment of the boat to gain easier access to the space (picture of original configuration):
xPress6.jpg


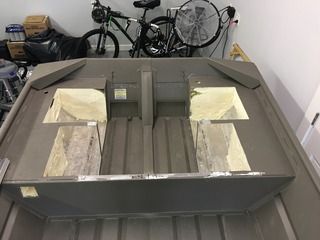
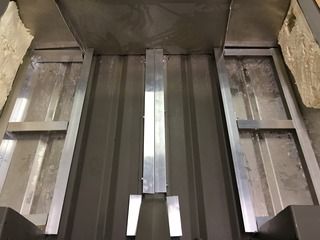
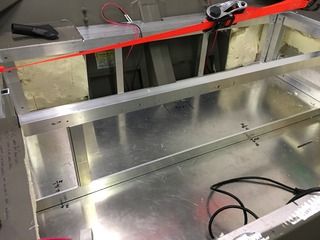
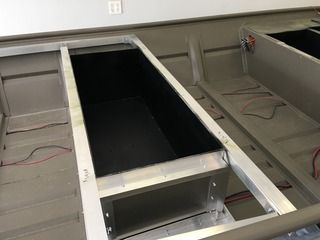
I am intentionally trying to make the rear end of this boat as heavy as possible as it would otherwise ride butt high once the front deck is installed. To add weight, I am using 2x12s to span the gap between the ribs and then topping that with 7/8 treated plywood. The four batteries and the on-board charger eat up most of the available space but there will be room for storage in front of the batteries for about 12-15 Plano boxes.
xPress5.jpg


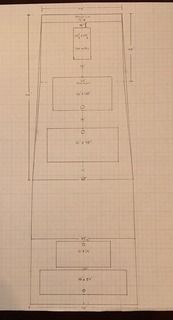
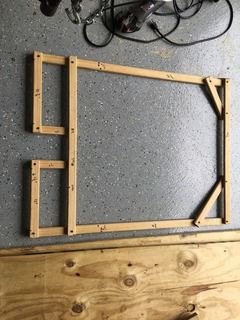
The measurements of the rear well are a little wonky and I only wanted to cut the plywood once, so I made a jig out of 1x2s for easy tracing and cutting.
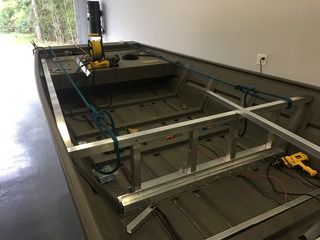
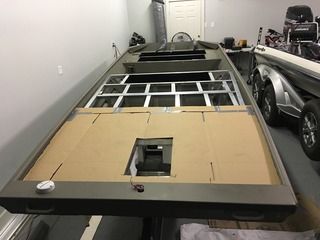
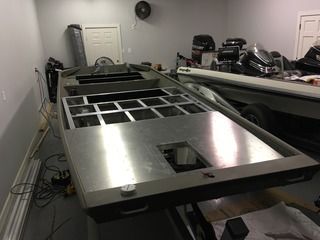
xPress7.jpg


What's Next:
Over the next week I will be painting the interior of the rear well flat black for a more finished look when the boat is complete. I will then add a layer of the 7/8 to the top of the rear deck for weight. I have a buddy that welds aluminum and will be taking the boat to him either late this week or early next so that we can draw up and start framing the front deck.

NELP NEEDED:
I will be having custom hatch lids made for the front and rear decks (5 lids in all). I have seen some of Dawson's from Fish-On Conversions lids on here and they look great, but take 6 weeks. Does anyone have a source for lids that can be turned-around in a couple of weeks?
 
You may want to search here for posts concerning treated lumber and aluminum boats. Not a good combination....:(
 
Welcome to Tin Boats !!!!!!!!!!!

. . . . pay attention to what Fire1386 said. . . .

if you have a buddy that welds aluminum,
why not have him make the hatches for you
while he has the boat ?????
if he can't cut sheet metal at his shop, just have
him fabricate the frames then you can pop-rivet
the sheet metal cover in yourself.

as for P/T plywood; the last bass boat I purchased had
1/2" P/T plywood that the P/O tried to "preserve" with latex
paint (that did not stick) - not enough screws to hold it down
and it warped and was soft in spots . . . had to replace the
whole thing with 1/2" BDX plywood preserved the proper way.

as you can see, there is not enough structure to hold an adult.
BlueFin Bow 2.JPG

oh yeah, good call on making the pattern first !!


.
 
I am located in College Station, Tx. Thanks for the feedback on the treated lumber. I'll look into that.
 
Well that's quite a ways away, but check out MTS Boat Worx out of Lake Alfred, FL. Don't know if he can/will ship but it's worth a shot.


Sent from my SM-N920P using Tapatalk
 
Ok. So I wasted some time and a little money as a result of poor research on my part. The wood floor in the rear well is going to be tossed and replaced with aluminum sheet. At least I only wasted one sheet of plywood and a 2x2x10.

Now I am trying to find the best place to buy the sheet. I am near Houston and will check a few local suppliers there to see if I can go grab it. It looks like 5052 is the way to go and, since weight is actually desired in the rear of the boat, I will be using .125. For the front deck I think I'll use .100 unless you guys really think .125 is necessary. There will be a few hatch lids on the front deck but nothing bigger than 18"x30' and that will be in an area that will not be stood on often but will be walked on when stepping onto the front deck.

I really want to avoid flexing and am willing to sacrifice weight for strength' especially since this boat will not have an outboard and will be used to troll around smaller lakes looking for bass.

What's you vote for the front deck? .100 of .125?
 
Thanks for the MTS Boat Worx recommendation Alvarez1112. I'll see if he can make my lids. Even if he can't, looking at the pictures of his work was inspiring.
 
So I have decided that the batteries are taking up too much of the rear well and I am considering cutting into the rear benches on each side to install the batteries. I will be losing flotation foam by doing so. I am assuming that the flotation is a cubic inches proposition so that I can just replace the lost foam with foam elsewhere, like in the floor, and be ok. I also assumed treated lumber was fine so I am learning not to trust my assumptions.

What are the lessons learned as far as flotation foam goes? Am I ok here with my assumptions?
 
All of the treated lumber has been trashed and I am going back in with aluminum. This gave me reason to reconsider the rear well design. I decided to cut into the boat, remove some foam, and open up more space for storage.

Original Deck Layout Design:
This is the original deck layout I was planning on using.
Deck%20Layout.jpeg


After cutting out the first rear section for battery and battery charger storage, I decided that making an additional two 4" cuts to expand the tackle storage section of the rear well to 36" wasn't worth the effort to remove the foam so I decided to make the tackle storage section 48" wide.

Marked for Cutting:
Rear%20Well%20Marked%20for%20Cutting.jpeg


After Cutting and Foam Removal:
Rear%20Well%20After%20Cut%20amp%20Foam%20Removal%20-%201.jpeg


Cutting the aluminum was a snap. Removing the foam was an absolute pain. I read in another post here about someone using a drywall saw for easy cutting. This did help but it was still too slow and tedious. I ended up getting a spade shovel and digging the foam in about 4" chunks and it make the initial bulk removal much faster. It was still tedious getting all of the left-over foam out but it's done.

I am going to be traveling most of next week but should be able to put in some time on the boat next weekend. My goal for next weekend is to install the angle for the floor support and the flooring itself. If things go really well, I may be able to frame up the walls for separating the two compartments in the rear.

I'll post progress pictures as she comes along. Slow and steady wins the race.
 
I have decided to make my own hatch lids by skinning a 3/4" square tube frame with 1/8" aluminum sheet. The framing for the door will be 1/8" 1 1/2" channel with 3/4" square tube for the 'stop' along three sides and a stainless piano hinge on the fourth.

Anyone see any issues with this design?
 
I got the rear well framed for the floor and was able to cut the sheet for the flooring. I am going to run the wires before screwing down the floor to the frame. I plan on countersinking the #10 screws used for the flooring, flipping deck, and all hatch lids so that I won't be able to feel and/or see the screw heads through the carpet.

Here's the rear we'll framed and ready for the flooring:
E25FBF0E-D693-47E4-B095-1550A3F0A8CB.jpg


Next I'll be installing the walls that will separate the rear battery / charger storage compartment and the rear tackle storage compartment. I hope to get that done and maybe even the two rear hatch lids done this weekend.

Happy Father's Day to all the dads out there. Mine's been with the Lord for several years now. I miss him. He would have loved a project like this one.
 
Got the wiring laid in place and the rear well floor installed. I've started with the divider wall framing and it is coming along nicely. I hope to have the divider wall in place tomorrow and then get everything in the rear well primed and painted.

0144D6B6-80DD-46EA-8422-E2C3184F7AB4.jpg
 
I made some decent progress this weekend but ran into a few problems and learned. First off, the rear deck that was already installed had a swell in the port side that wasn't too noticeable until I started measuring everything to make sure I was square and level across the back of the boat. I think that the swell is being caused by the foam and will cut some more foam out tomorrow to see if that helps. In the meantime, I used an old battery and a ratchet strap to "pull" the swell down so that I could begin installing the cross bars that will provide the lateral support.

B0F20030-CD2A-4643-A9F8-A657EFC952FB.jpg


HELP NEEDED - GREAT IDEA OR BIG MISTAKE?

I cut and was ready to mount the first cross member for the vertical support and I got to thinking, why do I need to screw or rivet the cross member prior to installing the aluminum wall sheet (1/8")? I have cut the cross member to the exact size needed so that there is no sway without it being fixed in place. Won't the aluminum sheet hold the cross member vertically without prefixing it?

I am going to post a separate post seeking help on the cross member but in case you're reading this and you know, please help a brother out.

Here's a pic of the cross member before fixing it into place:

EA2D3E21-214F-4AA9-A8B2-FA3B6C496C9A.jpg
 
If you're still considering, I used .063 diamond sheet with no issues for my floor and deck. Both are heavily braced and have solid foam beneath making contact so there is not much play, if any

Sent from my SM-G930V using Tapatalk
 
Made pretty good progress this week. I have the rear deck finished and the main storage compartment in the front deck complete. I primed the bare aluminum and then used truck bed liner to paint the interior of the boxes. It is taking a lot longer than I imagined but for a first build I'm pretty happy with how it's turning out. Here are some progress pictures:

Rear Compartments Primed:
E26FCFC7-1A7C-4C40-A2F1-E03AE9548724.jpg


Beginning of Front Deck:
FAFE7819-F5E2-4267-AE57-60ADAC14C518.jpg


I had to use a couple of ropes tied to the front of the boat for tension when starting to build off of the rear wall of the front deck. The ropes allowed me to adjust each side separately to ensure I was plumb and square.

Rear Compartments Painted:
5D364DC2-AA51-490B-B48B-AD2C813A0A00.jpg


Main Front Compartment Painted:
2091FB3B-8769-4CB7-A400-1DB75370C662.jpg


I ran out of angle and will have to get more next week. I still need to frame the rest of the front deck including the recessed trolling motor well. I hope to have the front deck completed by the end of next weekend.
 
I finally have all of the framing complete and of course forgot to take a picture of the completed framing before skinning the first section. I used cardboard to make a template before cutting the aluminum sheet and it sure made it easy. Johnny's latice trick looks great too but I had some boxes just layigng around.

The sheet is held with #6 stainless screws and I countersunk all of them so as to not feel them under the carpet.

I am going to hook up all of the electronics tomorrow before finishing the front deck skinning in case I need to pull any new wire for any reason (nicks/shorts, cut wire ...). A lot can happen to the wires stepping on and around them with cut aluminum bracing everywhere. Hopefully all is well with the wiring. If so, I think I can be done skinning tomorrow and ready to paint next week.

Here are some pictures of the progress:

301FCDD3-8043-44BF-8B05-9A971DB5AAFB.jpg


7FC8F681-BF01-433F-A9BC-C7D8B6ABEADD.jpg


52750B2B-BF6C-428F-BE61-08F5534CC6C3.jpg


40E38D75-F93E-406B-B063-5456B5A46D36.jpg
 
I am getting so close. I tested all of the wiring and everything checked out. All of the decking and flooring is in. I just need to paint the boat and then I'll be ready to lay the carpet and then tackle the lids. I am somewhat dreading the hatch lid construction. I suppose I should be decent at it by the third one.

Here's the progress pictures:

5FE1A1C6-9046-4780-9A91-DBABC099B34F.jpg


9C7B2401-D3D7-416E-A675-05863CFD2D69.jpg


F579A6E0-2EE2-4894-A426-BECDD2776642.jpg
 
Top